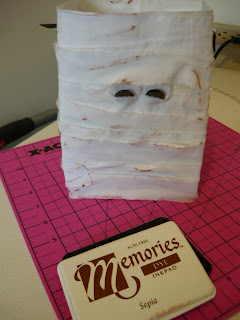
 First you will need:
-a white paper lunch bag
-1 inch strips of white fabric
-1 piece of white cardstock
-glue
-hot glue
-googly eyes
1. Start by cutting 3 and 3/4 inches off the top of your bag. You could make your bag the full size but that takes more fabric and time and I like the proportions of this size better.
 2. Next cut 2 pieces of cardstock 3 3/8 x 7 inches.
 3. Open up the bag and glue the cardstock to each side to make it stay open and give it more stability.
 4. Now take your fabric strips (the longer they are to start with the quicker the project will go) and
 begin wrapping them around the bag (one at a time) securing with hot glue. Don't be too neat while doing this-mummy's are not wrapped perfectly. Continue all the way around the bag to the bottom.
  5. Next fasten the eyes, tucking them in under one of the layers of fabric. Then take another fabric strip and wrap it around slightly over the top of the eyes.


Oh my goodness I LOVE these!!! Would like to make them for my co-workers this year for Halloween!
ReplyDelete