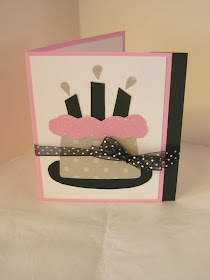
card=4x5" (finished size)
Strip=5x1"
Layer= 3 3/4 x4 3/4"
2. Attach the strip (in this case the black piece) to the back side of the front of the card. I ran a piece of double sided tape down half of it and adhered it to the back...
like this.
3. Next adhere the layer piece (the white piece on this card) to the front of the card with double sided tape. You could also attach it with brads or eyelets or sew it too (that would be cute).
4. Print out the pattern, cut out the pieces and trace them on your desired paper choices then cut again. Here is the link to the cake pattern. Adhere all the pieces to the front of your card. You could ink or chalk the edges first if desired.
5. To attach the ribbon first cut two lengths of ribbon long enough to tie them into a bow. Then make a small slit in the fold of the card (see the picture) and slip one end of one piece of ribbon through it and into the inside of the card (see 2nd image below) and attach it to the inside with glue or a glue dot. Attach the other ribbon on the inside of the front of the card and bring both together around the front of the card and tie in a bow. You can adhere the bow with a glue dot if you wish.TADA!!! That is it folks.
Here is another version of the same card.
Enjoy. Happy Crafting.


Loving this week. So far my fav is the birthday hat. Can't wait to see whats next. Thank you for all the effort you put into such a wonderful blog.
ReplyDeleteI am loving all of the cards. I need to get busy making them!
ReplyDeleteHeather I just loved using this template and I hope you won't mind that I shared and linked to it on my blog here http://nothinsayslovin.blogspot.com/2011/01/lovin-my-scraps-and-template.html
ReplyDeleteHad such fun with it - thanks sooooo much for sharing your ideas. Blessings