I decided to add a bonus day to the sew along and include a tutorial for these cute flowers that can be made into a clip or a headband. These are made from scraps from the same t-shirts you used in the other two pieces plus a button and hot glue.
To begin cut 4 circles out of your t-shirts (2 of each color). I did not use a pattern-it doesn't really matter about how perfect your circle is but if you feel more comfortable with a pattern-be my guest. You want to try and keep all the circles about the same size. I cut two layers at a time. (A side note for the headband I made my circles much smaller than I did for the hair clip). This is not in the picture but you will also need 1 larger circle of either material.
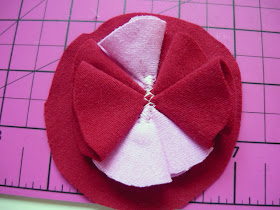
Take one circle and fold it in halfand then fold over one side but not exactly in half (about a 1/3).
Repeat with your other circles. I laid mine all out on the larger circle I had cut. If you want help to hold them in place put a little dab of hot glue under each piece.
Now take this to your sewing machine and stitch over the centers of each one. I used a little zig zag stitch.
Repeat now with the remaining 4 circles. Place them over top of the first layer only alternate the colors.
Again stitch over the center.
Trim the bottom circle so that it is smaller than the top pieces. Also trim any edges that seem to be sticking out.
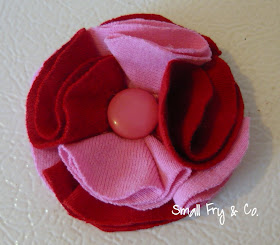
Add a button to the center. I sewed it on first then dabbed some hot glue under it and stuck my flower to it.
I added a bit of hot glue in the spaces and folds and added a few tiny folds and tucks with my fingers to get my flower to stand up and a be a bit more 3-dimensional.
Add a fabric covered hair clip or
sew these to a headband. This headband I made by cutting one long strip from my t-shirt material, and sewing the ends together to form a band. I made sure it was the right size before sewing. I attached the flowers with some hot glue.
And this is what I had left over after I made 2 of each project. What a fantastic repurpose don't you think? Well worth the $3.00.
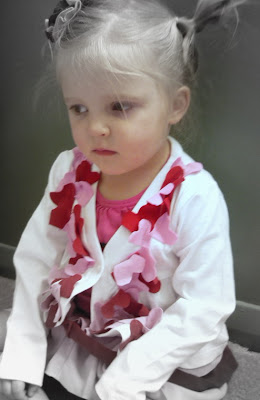
And now for my beautiful models:
And of course the out-takes.
Happy sewing everyone. Thanks for joining me.


Cute ute cute!!! I've made some similar...but I like the offset circles better than mine. They were too perfect, and didn't have character.
ReplyDeleteKeep the cuteness coming, I love to see and follow all your tutorials.
So cute!! I always love new hair bow ideas!!
ReplyDeleteHi! I am new to your blog. What a great upcycle project. So adorable. I am going to subscribe. :)
ReplyDeleteAs pretty as the flower is, I have to say my favorite part of this post was the outtakes. What cute pictures (and of course, cute models)!
ReplyDelete