Showing posts with label Christmas. Show all posts

Nov 19, 2013

DIY Clipboard Christmas Countdown


I know that great bloggers would have had this Christmas project ready and posted the minute Halloween was over, but great bloggers would have also posted more than 1 post in the last 3 months-so I guess I am not going for the "Great Bloggers Award" any time soon.  I actually have had my mind nearly completely focused on my in home preschool that I am doing and LOVING.  I haven't even really had crafty thoughts for a while but my great friend and neighbor has been helping get out of that anti crafts slump and I am starting to dream in paper crafts once again.  I decided that I wanted to put together a craft night for anyone in town that wanted to join.  I got word that some wanted to make a Christmas advent.  I needed to find something that would be fairly low cost, easy enough for even "non crafters" and could be completed before December.  I searched quite a bit on the Internet and came across this (and now sadly I can not find it again to site the source-if you have seen it let me know):


There were no instructions but I loved the idea and figured that it could be something that could be easily made at our craft night.  So I set out to create my own version.  And I ended up loving it so much that I just had to share (I know lots of people like to get together and craft over Thanksgiving-maybe there is still time for others to gather the supplies to make one).

The project cost $13.00 for all of the supplies (and each participant had to bring their own Christmas paper).  I found the clipboards at Walmart, and the hooks (in the hardware section by the towel racks and stuff).  I bought the tags online from Ebay and got them for much cheaper than you could anywhere else.  The stands were purchased from Michaels crafts (I had a 20% off your entire purchase coupon-you can get one by signing up for their e-mails).  I was going to use letter stickers and number stickers but they were way out of the budgeted amount so instead I found an adorable printable number set (found here at Ziggles) and created my own tag that says "days until" and Christmas.  Having them printed or copied some place is much more affordable than buying packaged stickers.  We used spray glue to attach the paper to the clipboard and then spray glue and double sided tape to make the tags.  I bought hangerless tags but we created our own using crochet thread (4 " pieces).

This is what the hooks looked like.  These were attached with hot glue to the clipboard after the background paper was put on.  I tied a couple of ribbons through the holes on the hook to dress it up a bit.


I created these "Days Until" tags that were glued to a double layered tag cut from cardstock.


The clip on the clipboard was disguised with bits of ribbon tied around it.  


We used mounting tape to give the tags a raised look and I actually ended up using it on a lot of my tags.


Here is what it looks like from the side with the stand.  I love the big lump of brightly colored tags.  So fun and festive and exciting for the kids.  I am going to put a little activity on the back of each one so we have something to do each day as we count down.

I started with a blank board and created my tags from #25 down to 1.  

This is #25.  I used the pattern that you can find here (to make a felt nativity) and downsized it and cut it out of paper.

I wanted to give you an individual look at all the other tags.  I loved creating these.  Some are simple and some are more complicated.  After I made each one I said, "that is my favorite" but ended up loving the next one even more.
For #22 I cut the tag to the shape of the reindeer face (this is from an old Pebbles in my Pocket paper piecing pattern).  I used the same idea only cut it a different size.  I wrapped bakers twine around this antlers to give him a "tangled up" look.

For #18 I wrapped a long piece of yarn around the tag and tied it with a piece of bakers twine off center.  #17 is made with a 3D sticker.

#16 came to me in my sleep.  I cut the tag down the same size as the snowman.  

#12 has 3D pom pom ear muffs and a yarn scarf. 

#8 is made from a BUNCH of teeny tiny holly leaves I cut from green cardstock.  The berries are small glue dots covered in glitter.  #5 might be my favorite.  I cut little letters out of chipboard (and after remembered that I had chipboard letters already premade) and sprayed them with spray glue and then wrapped them in mini bakers twine.  I attached them with glue dots.

#4 has a scarf cut from a piece of an old t-shirt.  #2 has 3D bows made from bakers twine and ribbon and #1 has a 1 1/2" piece of satin ribbon tied around it.  


I am so happy with how it turned out.  Making the tags was a bit meticulous but that is just because I had so many ideas that I wanted to do.  You could make them much simpler for sure.  I originally wanted them to all coordinate but in the end I love the variety and all the different tags.  The kids will be so excited to see "what comes next."  I can hardly wait until December 1st to put it to use.   We are going to count from 1 to 25 but you could count backwards too, or just put one tag on at a time.  I love the big pile of tags to go through and it will help the kids see that we are getting closer to Christmas as the pile gets smaller and smaller.  Tis the season for major craft inspiration and wonderfully fun paper projects.  Enjoy and please share.


Pin It!
Print Friendly and PDF

Dec 24, 2012

Merry Christmas From My Little Bunch


I hope you all have a wonderful and magical Christmas day.  I shall see you in the new year.
Pin It!
Print Friendly and PDF

Dec 17, 2012

Paper Nativity Tag


I recently found The 24 Days of Mormon Christmas at Confessions of a Slacker Mom.  It is a downloadable file of stories, songs, scriptures and links to videos to use in your family the 24 days leading up to Christmas. It's like a mini devotional for every night of December up to Christmas.  If you purchase the gifting license for $12.00 it gives you the ability to either print out or burn 100 copies of The 24 Days of Mormon Christmas to give as gifts to your friends.  I thought, for taking all the work of searching for things that go together for each night of the month it was worth the $12.00 but then when I read that I could share it with 100 friends I was sold.  What a great neighbor or friend gift.  It is a perfect gift to give to your in laws or the women that you visit teach (assuming of course that all of the above mentioned people would use something like this).  Well I bought the gifting license and printed off all of the pages to put in a binder to use for myself and then burned copies to CD's to give to some of our neighbors and a few friends ( I chose people with small children because even though the whole thing is not just for children, there are lots of things that would be perfect for families with children).  I instantly saw in my head the CD wrapped up with a nativity tag attached.  So I searched Pinterest first to find out how to make a paper CD package and found these instructions:

Then I searched for nativities (which if you are wanting tons of ideas type that into the search box on Pinterest and select boards-I found so many fantastic nativity boards) and I found this pattern (which is to make a felt ornament).

It was simple and I knew I could make a paper version.  I redrew it, scaled it down quite a bit and then cut out individual pattern pieces.  I then cut all the pieces out of paper and assembled them into this simple and cute little Mary and Joseph with the baby Jesus scene.  I attached it to the CD holder, tied a twine bow around it and added a little gift tag.  I love how they turned out.

Even though it won't be able to be used much this Christmas season, I am hoping that if I tuck it in with a little plate of cookies that those who receive it will have it out and ready next December 1st to help them get into the true spirit of the season.
Pin It!
Print Friendly and PDF

Dec 12, 2012

Peg Doll Nativity Clothing Tutorial

I found the original idea for this fantastic and simple nativity at Little Inspirations (click on the picture below to go to the post).  I loved everything about it instantly and new I had to make a set.  My plan is to make a set for each of my kids (someday).
Pinned Image
I found a set of peg dolls at Hobby Lobby for $2.99.  The set includes enough peg dolls to make all your characters minus the baby (and I used a wooden clothes pin for that).  When it came time to make the characters it was not quiet as easy as I thought it would be.  Even though they are simple, figuring out how to make everything so that you can tell what it is and have it look good was a bit tricky.  So I decided to save you all a little work and write a tutorial to make my version of the peg doll nativity clothing, inspired 100% by the blog: Little Inspirations.
 I have included a link to the pattern at the end of this tutorial.  There is a chance that this pattern could print slightly smaller than it was originally drawn.  I think it is a computer issue because our old computer used to print everything smaller but our new computer gives me the option to change the print size and that doesn't happen any more.  So just beware.  Cut one piece first and double check that it fits before cutting everything.  You may have to cut slightly bigger.
After you have cut everything then the assembly is really pretty basic.
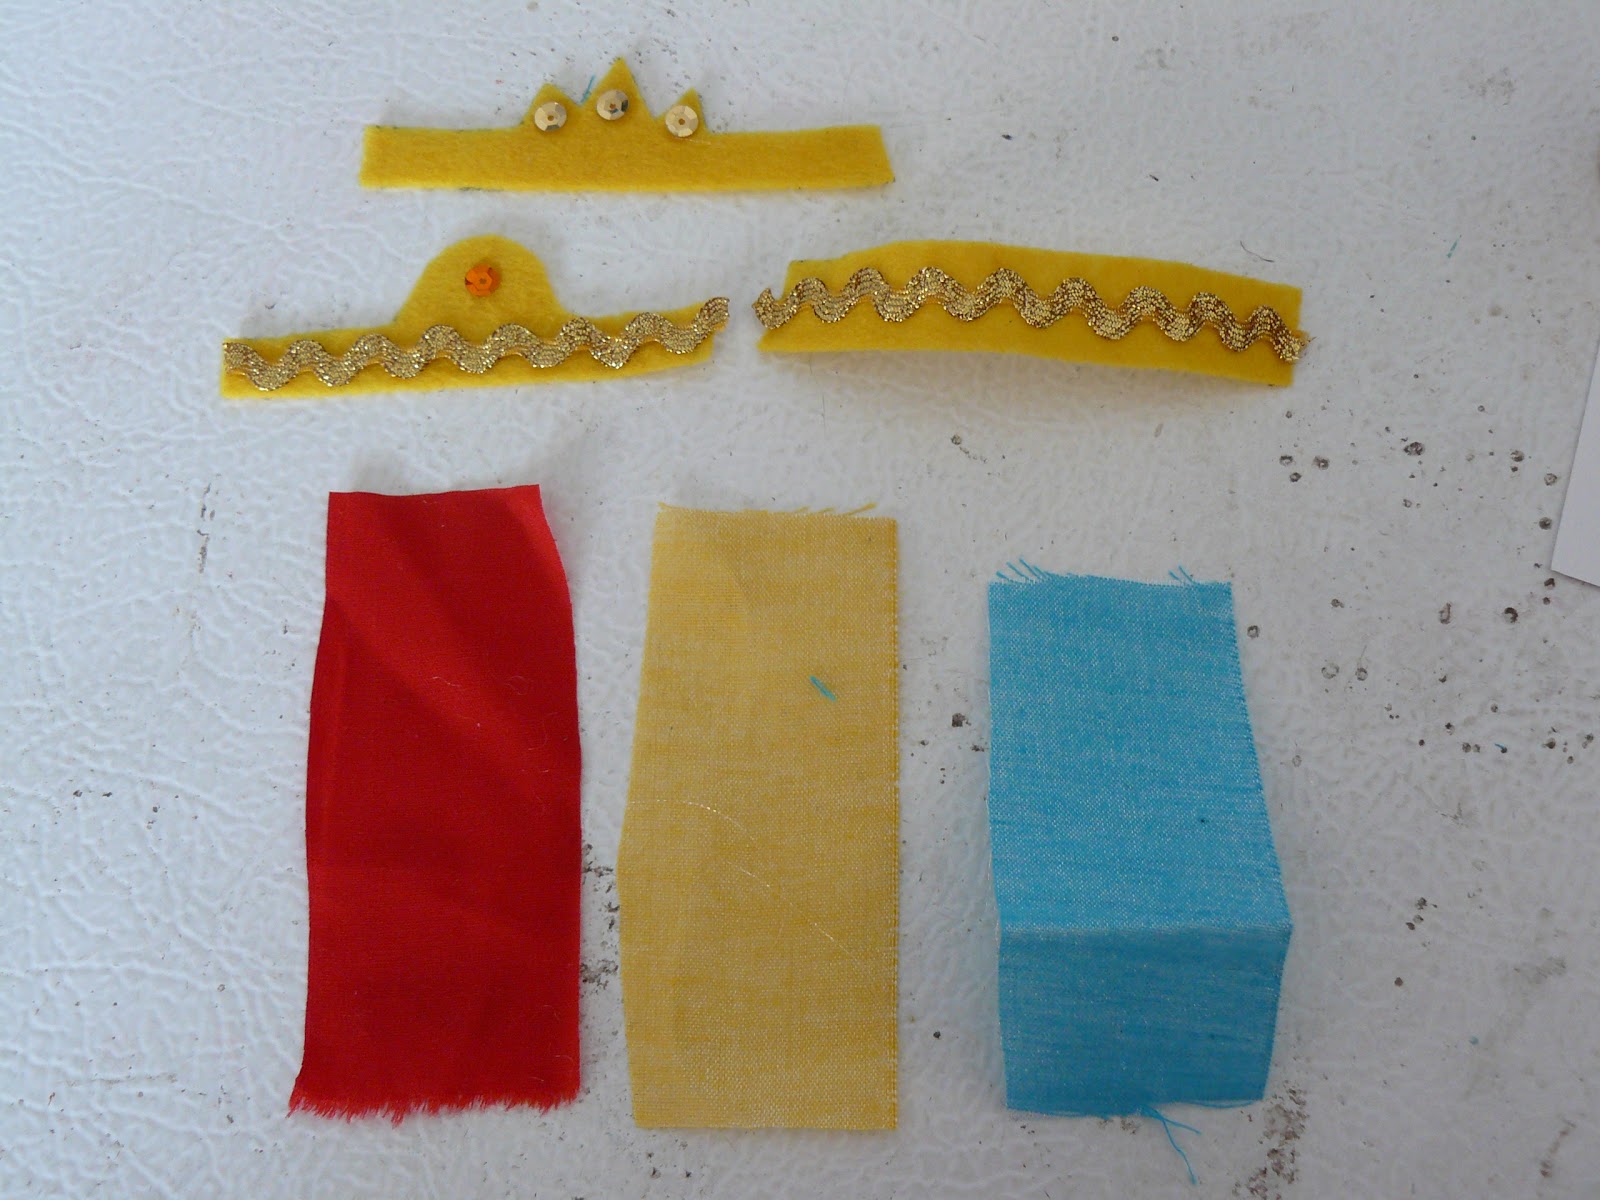
Here are my basic wise men outfits.
 To dress the dolls I just hot glued one end of fabric to the body, wrapped the fabric around and secured with more hot glue.
 To make the crowns I created a little circle first (secured with glue) and then ran a small bead of glue around the inside bottom and attached it to the head.
 I added a tie around the waist and a robe.
 Behold: The Wise men
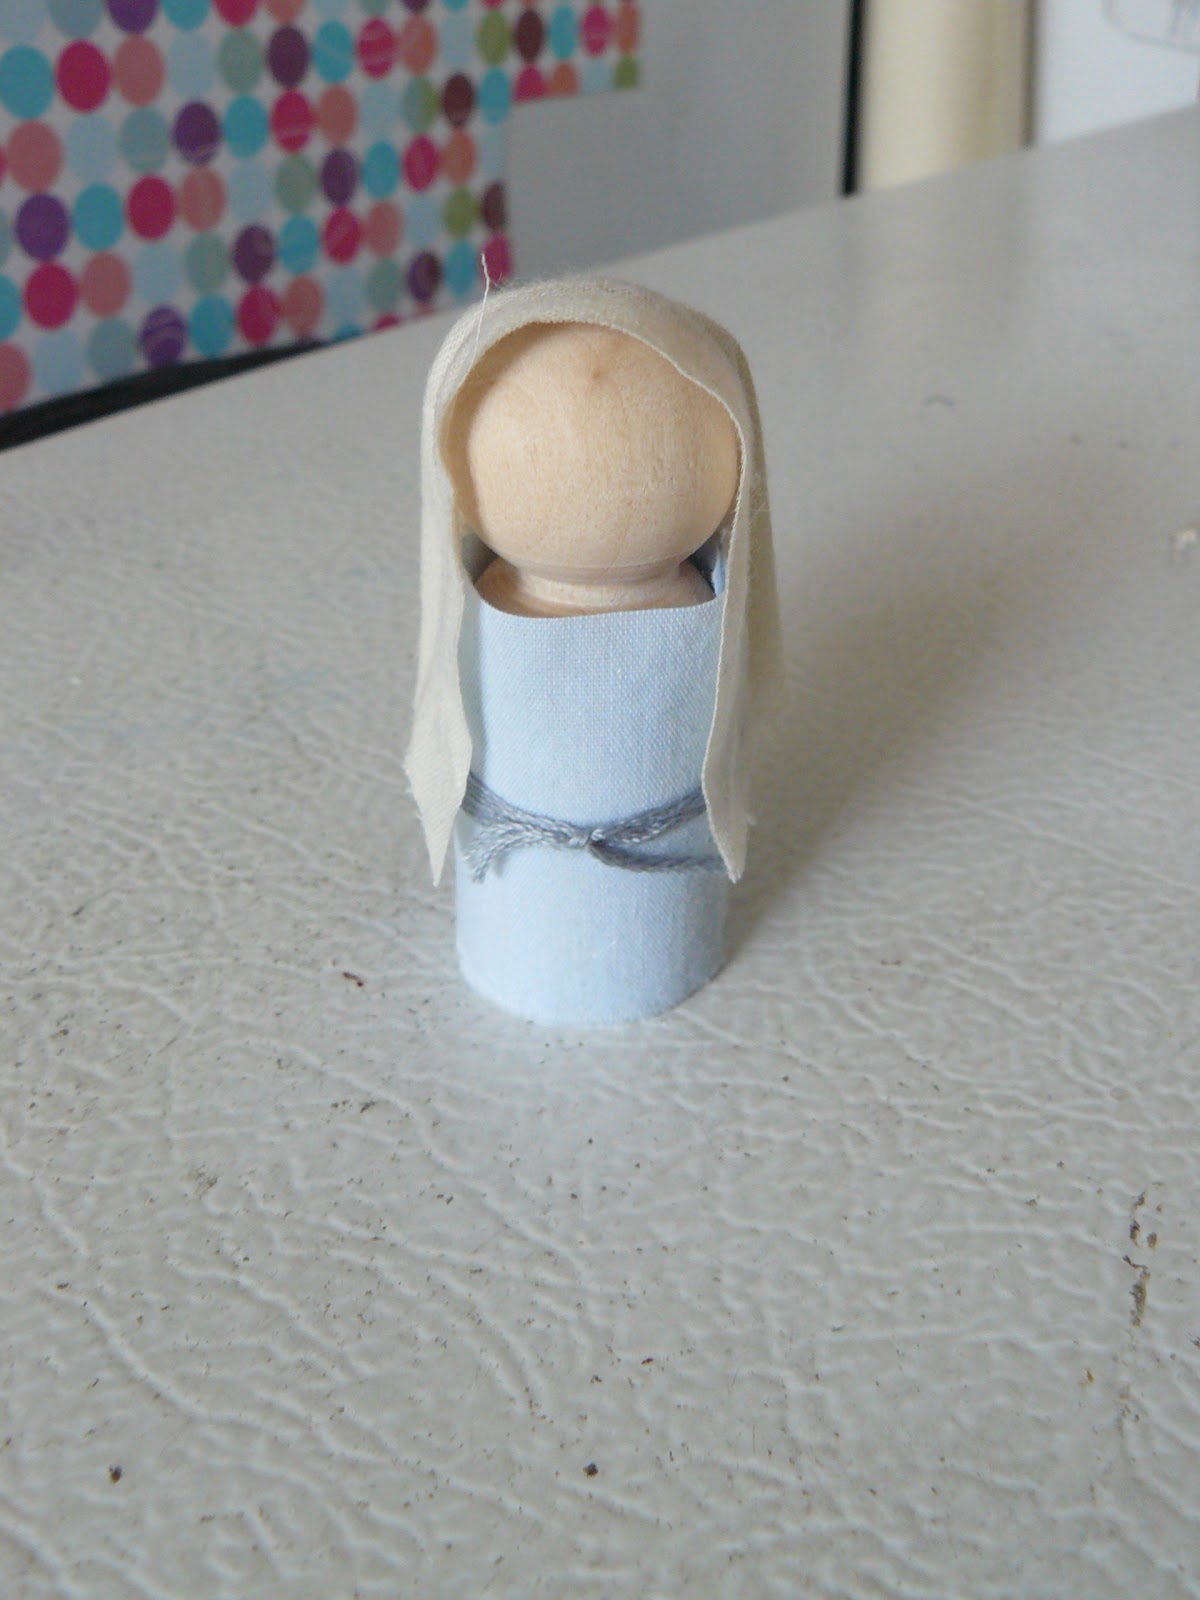
 I dressed Mary the same as the wise men and added a tie (embroidery floss) around her waist.  To attach her head covering I first ran a bead of glue down the straight part of the head covering fabric.  I folded that over her head and down the sides of her body.
 Then I attached the back with a little dab of glue.
 Then I made a couple of little folds also held down with glue
Behold: Mary
 Joseph is dressed the same way as Mary only I folded the back of his head covering a bit different.  His belt is made from a piece of garden twine.
 Behold: Joseph
 Behold: The Shepherds (head coverings are made of burlap with garden twine belts)
 Behold : The Angel ( I didn't want to give the angel wings because I do believe in angels but I don't believe they have wings so instead I gave the angel a bit of a different robe-one that was more flowy.  I did give the angel a halo just to make sure it was recognizable as an angel).
 For the baby Jesus I cut off the top part of a rounded clothes pin.  This was done very sloppily with a not too sharp saw so pretty much anyone can do it.
 Behold: The baby Jesus (wrapped in swaddling clothes-I used the basic head covering pattern to cut this piece)
 The Nativity: simple and sweet.  Perfect for kids to play with and not break.  The simplicity is perfect and humble I think.
 "Oh come let us adore Him, Christ the Lord."


Peg Doll Nativity Clothing
Pin It!
Print Friendly and PDF

Dec 11, 2012

Mini Fabric Covered Christmas Balls

I was invited to an ornament exchange party and needed to come up with 10 ornaments to share.  I wanted something that would be cute but inexpensive and easy to make.  I had pinned a tutorial to make these ornaments and they turned out to be perfect in all 3 categories.  They were inexpensive (I used fabric scraps I had on hand and Styrofoam balls I had on hand), they were really easy to make (you can check out the tutorial at Everyday Beautiful and most importantly I think they look stinkin cute.  I made mine with mini Styrofoam balls and divided them into 6 sections.  These remind me of ornaments my mom had when we were kids.  I just love them.  If you need a last minute ornament idea this might just be the one for you.  


Pin It!
Print Friendly and PDF

Dec 10, 2012

Make Ahead Monday: Peppermint Bark Cheesecake Pops


I was at home in Canada for a brief visit last month and heard a commercial for cheesecake pops.  My mouth immediately began watering.  What a fantastic idea-only I did not want to have to buy them.  I wanted to find a way to make them myself.  So I called up my brother who just graduated from pastry school at the French Culinary Institute in NewYork City and asked him if he would help me come up with a cheesecake pop that any home cook could make.  I wanted something that didn't involve the overwhelming and time consuming business of making and baking a real cheesecake first and I wanted something that was delicious. People, my brother delivered on both fronts.
This is his little business that he has started on the side of his full time job: Dessert of Course.  And just a pat on the back for him: he was a Broadway performer extraordinaire and hung up his dancing shoes to pursue his other love: sugar, and I think he has found a perfect fit for himself.  Now onto the good stuff.
Just remember that this is the simple home cook version.  If you wanted to get fancy you could make and bake a full cheesecake and go from there.

 So for this recipe you will need:
A no bake cheesecake mix
Milk (to go in the mix)
Candy canes (crushed)
Chocolate cookies (he used wafers, I used Oreos)
White candy melts (or what ever color suits your fancy)
Sucker sticks (or I used Popsicle sticks)
Begin by making the cheesecake according to the package directions.  You are not going to need the graham crumbs so save them for something else.  Once mixed, crush your cookies (I used about 10 oreos-and I could have maybe used a couple more.  My brother used about a half a box of the wafer cookies) and fold them into the cheesecake batter then put it in the fridge to thicken.
Thicken for the length of time indicated on the box.  I actually never looked at the box as I was in a rush and I ended up being distracted so I came back to mine after about 6 hours and it was ready.  My brother began to form his cheesecake into balls right from the fridge.  He rubbed some Crisco on his hands and scooped out a bit of batter with a small cookie dough scoop then rolled it into round balls.  I found, when I made mine, that the batter was a bit too soft to roll into balls so I put mine in the freezer for additional time until it was the thickness of ice cream.  Then it was easier to scoop and roll into balls.  Again you need to grease your hands a bit before rolling.  Place the cheesecake balls onto a sheet or a plate and freeze again until they are firm but not solid as you want to insert sucker sticks into them.
Once they are firm, take the out of the freezer and insert the sucker sticks.  You can dip the ends of the sticks in some candy melts (melted of course) first before inserting and that will help to hold them in place.  I didn't do this with the Popsicle stick method.
Return those to the freezer and in the meantime melt your candy melts according to the package directions (only add 1 tbsp of shortening once they are melted to help thin the candy coating down).
My brother got fancy and did a swirl effect in his white covering.
He added a few drops of red to the white and cut through with a knife back and forth a few times.

Remove the cheesecake pops when they are frozen solid.  Dip each one in the candy melts, or gently run it back and forth in the swirled candy melts if you want.  Immediately dip the pop into the crushed candy canes or sprinkle them on the coating because it will harden almost instantly.  Work quickly so that you can dip all the pops while they are frozen solid then store them in the freezer until you need to serve them.
Here are few different versions: swirled, dipped with candy canes, dipped and drizzled with candy melts, dipped in candy melts and then in cookie crumbs and cookie crumb coating with a drizzle.
Mine aren't quite as fancy: white candy coating with crushed candy cane bottoms.
These need to be served cold.  They can be taken out a few minutes in advance to thaw partially but if you let them sit out for a long time you will have a mess on your hands.  At room temperature the inside is near to a thick pudding consistency.  They are better with more firmness to them like thick ice cream.  And just so you can consider yourself warned: THESE ARE VERY RICH.  One will be sufficient and totally delectable.
Pin It!
Print Friendly and PDF
Related Posts Plugin for WordPress, Blogger...