Showing posts with label Crafts. Show all posts

Aug 7, 2013

Back To School Wreath


My Small Fry is starting Kindergarten in a few weeks and we are both beyond excited.  I am not excited because she will be gone, and I will only have 2 to wrangle most of the day (though that does have plenty of perks) but I am excited because I have ALWAYS LOVED SCHOOL.  As a little girl I played school more than anything else.  I even asked for a photocopier as a gift so that I could more easily make the assingments for my pretend students.  I love shopping for school supplies.  I always wanted to be a teacher and loved the 5 years I got to do it (well okay... let's be honest...I hated the last year because I was pregnant and miserable and didn't have my heart in it at all).  I love the smell of new crayons.  I love the idea of getting to be a SCHOOL MOM (which I know may or may not loose it's charm down the road).  I can't wait to pack lunches, hang up projects, volunteer at school and prepare after school snacks.  I am sure all you vetran moms are rolling your eyes thinking, "oh how fast you will get a grip lady" but for now at least I am just super excited about school.  And Small Fry is too.  She is smart and she loves friends and I think/hope she will just absorb every bit of new information she possibly can (and hopefully not drive the teacher crazy by correcting everything she says and does wrong).  
Well I know that school isn't quite starting but the store shelves are being lined with school supplies and I can hardly steer my cart away from them and since we are in the midst of school clothes shopping and my husband, who teaches school, is getting his classroom ready, the energy of a new school year is in the air around here and I just had to celebrate by making a "Back to School" wreath for our door. 
I did a lot of Internet searching for ideas for back to school wreaths but I wanted something really unique and not necessarily plastered with pencils, scissors and glue.  After seeing a book page wreath I got the inspiration to use loose leaf (is that even still in existence...seems like such an antiquated word) as the background for this wreath.  

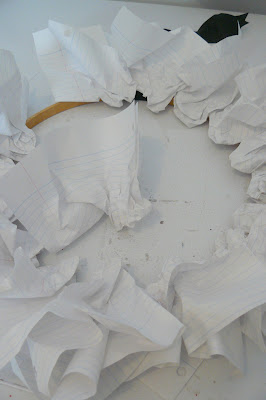
 What I did was used a embroidery hoop as my base and then balled up sheets of loose leaf.  To hold them together I drizzled hot glue on the center of each sheet and then bunched it up (just like you would if you had made a mistake and were going to throw the paper away).
 I then glued these onto the base.  After doing one layer all around I decided that it needed more depth and added a second layer of loose leaf sheets.  If you think about this, it is really inexpensive, especially right now with school supplies being on sale.  And you can pick up an embroidery hoop at pretty much any thrift store if you don't have one already on hand.
Here is how it looks with 2 layers-I love it.
 For decorations I wanted to keep it pretty simple.  I used mini chalkboards to write the words on.
 For the apples I got my inspiration from no biggie and made a pretty similar version of their paper apple except I used a piece of a tree branch for the stems (hot glued to the back).

 I love how it turned out and it was so easy.  Small Fry was so excited for a school thing on the door, except that she reminded me that she hasn't ever gone to school so how can she be going "back to school."  Smart alec.
Just in time for school to start, you could totally whip this up in an hour or less.  It would be perfect for your front door or for a teachers door for that matter.  Doesn't it just put you in the mood for school?

Also shared here:


Pin It!
Print Friendly and PDF

Jun 14, 2013

Coffee Filter Sunflower Wreath

It is crazy and wonderful to me, where I get inspiration from sometimes.  The inspiration from this project came from a  kids craft at out local community center that I saw at a glance after I took a dance fitness class.  I saw these cute little sunflowers the kids had made out of coffee filters that they colored with crayons and I saw this wreath in my mind.  And I have to say it is even more beautiful than I pictured it.  I love how it turned out-so perfectly cheery and welcoming for the summer.

For this you will need:
coffee filters-1 package will do
yellow food coloring plus a drop of orange (I actually used a combo of yellow food coloring and a bit of orange Kool-aid because I didn't have orange food coloring)
Brown terry towel material (an old towel would work for this)
Hot glue
Wreath Base
Something to wrap said wreath base in (I used some fabric scraps but burlap would look awesome too-I didn't have enough)

Step 1: Dye your coffee filters.  Let me share a link to my post on how to do this the super quick and easy way using Kool-aid and your dryer.   Once these are dry lay 3 or 4 or 5 filters on top of each other.  I used a combination of sunflowers made from 3, and from 4 and from 5 on my wreath.  Ones made with 5 filters are fluffier.
Step 2: Fold the stack in half.
Step 3: Cut to look flower like.  I trimmed some of mine down before cutting the petals so that I would have a variety of shapes of sunflowers.  They don't have to be perfect because you can't tell in the final product.
Step 4: Open up the stack and alternate the layers so that all the petals are not laying directly on top of each other.
Step 5: Put a dab of hot glue between each layer.
Step 6: Cut the flower centers from the terry towel and glue in place.  I just roughly cut circles.
Step 7: Repeat....A LOT.
Step 8: Wrap your wreath if you haven't already and then begin gluing on the flowers.  Alternate them so they aren't all just directly on top of the wreath, have a few to the sides.

And you are done.  And it looks AMAZING.  I just love how happy it looks.  I love sunflowers except for the fact that they loose their petals so quickly and their heads droop.  But not this wreath-these babies will last all summer long (unless you put this directly in the sun or where it gets hit with rain...then I can't guarantee how long it will last).
Happy summer everyone.


Also shared here:

It's Overflowing

504 Main
Happy Go Lucky
Happy Hour Friday Button
Skip To My Lou

Pin It!
Print Friendly and PDF

May 21, 2013

Patriotic Pop Can Wreath


What could be more American than Soda Pop?  Last fall I saw a fall wreath made of leaves cut from pop cans.  Since then I have wanted to make a wreath using pop cans but I couldn't come up with the right color combination.  Then one morning on a walk I got an inspiration to make a patriotic wreath using red, white and blue-very popular pop can colors.  This is one of those projects that makes you grateful that you recycle because the cost is minimal and the supplies are usually plentiful.  
To begin you need to gather and cut your pop cans.  To do this I used a plain old steak knife.  I am not going to guarantee that this won't ruin said steak knife.  I happen to have a surplus of these so I didn't mind destroying one for this cause and as it turned out it didn't destroy it.  I just want to add that disclaimer so that no one gets upset if they ruin their good steak knives doing this.  
 Make your first cut around the top rim of the can-I do this just above where the can begins to angle up.  Just stick the point of the knife in and cut (WARNING: if you don't like the sound of nails on a chalkboard you may not like this either).
 Then repeat and cut off the other end.  Be careful because the can edges do become sharp.
 Lastly cut the remaining can piece with a pair of scissors.  You can flatten this piece by putting it under something heavy like a brick out on the cement, or stepping on it.
Next you will want to cut your stars.  I did this using die cuts at my husbands school.  I was able to cut 2 stars from each pop can piece though the star die was bigger than the pop can piece was wide so some of the tips got cut off.  An amazing thing happens when you cut the can with a die cut - the edges are not sharp. Now I know what some of you might be thinking, "I don't have any die cuts but I bet I could just cut those out with scissors."  That is what I would have thought if I didn't have access to die cuts but let me tell you it will take longer, be harder, be sharper and probably won't turn out as good so I highly recommend finding some die cuts to do this.  Many scrapbook places have access to them, and schools.  Your neighbor may even have their own die cut machine-I know mine does.  
I don't know exactly how many pop cans I used but it was quite a few-probably at least 2 grocery sacks full (of pop cans before they were cut down).
 I also thought that some little yellow stars shooting off of wire curls might look cut so I cut out some mini stars from some lemonade cans.
 Then using good old hot glue, stick the stars onto your wreath base.  I used a grapevine wreath.  I kind of liked a bit of a rustic look so I crinkled and bent each star before sticking it on.  WARNING: hot glue on an aluminum can piece is HOT!!!  Just overlap as you fill in the whole wreath base.
 Then I added the mini stars by gluing them first to wire curls I made by wrapping a piece of wire around a pencil.  Glue those randomly all over the wreath.
 Perfect and patriotic. Soda is American, pop cans are American, and recycling should be part of every Americans life, so I love all the things this represents.
What a fun way to brighten up your front door this summer.  I bet if you look around your garage long enough you will find pretty much all the supplies you will need.  And it is a good reason to enjoy a cold soda on a hot day this summer.  
God bless America.

Also shared here:

Pin It!
Print Friendly and PDF

Mar 8, 2013

DIY Paper Bag Picnic Basket

I wanted to make my kids paper Easter baskets to go with my table decor for our up come family Bunny Brunch but I needed them to be easy.  I did a few online searches and found some really cute woven paper baskets but they all seemed a bit too time consuming for my needs and I found lots of paper baskets made from templates...but you had to buy the templates.  So I did what I love to do -created my own version.
 For this you will need:
1 lunch size paper bag (you know the "normal" size)
1 paper grocery bag
tape
spray glue
brown chalk (optional)

Step 1: cut the paper bag down to 4 inches from the bottom end
Step 2: cut 2 pieces of cardstock the same size as the width of the bag and 2 pieces of cardstock the same size as the sides of the bag.
Step 3: spray one side of each piece of cardstock and glue them inside the paper bag
Step 4: from the large paper grocery bag cut 7 strips of paper about 1 1/4" wide.  The length doesn't matter because you will cut them to size but if you make them long then there will be enough to make both sides of the basket.  Mine were about  12 to 13 inches long.


Step 5: chalk the sides of each strip-the whole length because you will use it for both sides of the basket.
Step 6: begin weaving the strips.  Use 4 strips vertically and you will use 3 strips horizontally.
Keep the strips as close together as possible.  This is hard because there is nothing holding them together but just keep in mind that you want everything tight.

Step 7: after you have woven the 7 strips together like so (measure it to make sure it will cover the side of the lunch bag) and then cut the strips down so that about a 1/2 inch is overhanging.
Step 8: Flip the woven pieces over
and fold back the strips so that all of them are flush with each other.

Step 9: tape the back pieces down to hold everything in place.  Then spray the back with the spray glue and attach to the front and back of the paper bag.
Step 10: now create the handle but cutting a piece 3"x12".
Step 11: fold this piece in half.
Step 12: open the piece back up and fold each side in towards the middle.

Step 13: then fold it in half again and stitch with your sewing machine all the way around.
Step 14: finally attach the handle to each side of the paper bag with an eyelet.
And there it is. 
These don't only have to be used for Easter baskets.  They would be cute filled with an individual lunch for a special picnic, or filled with dad's favorite treats.
But they do look adorable filled with Easter eggs (or chocolate or cookies would work just fine).

I am going to have one for each of my kids sitting by their plate stuffed with candy/treat filled eggs.
Perfectly easy and perfect for Easter.  Paper bag picnic baskets-so cute!!

Also shared here:
http://whipperberry.com/2013/03/friday-flair-link-party-bunny-pouch-edition.html


Rooted In Thyme
Pin It!
Print Friendly and PDF
Related Posts Plugin for WordPress, Blogger...