Showing posts with label Recipes. Show all posts

Feb 24, 2014

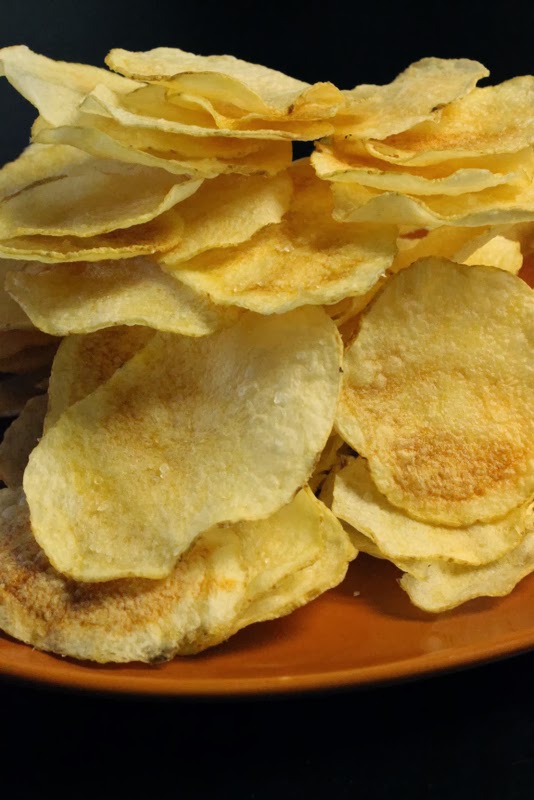
Microwave Salt and Vinegar Chips-Crispy, Crunchy and Zingy.

 
What is your favorite flavor of potato chips?  Mine are salt and vinegar (and even as I type that I can feel my mouth salivating thinking of the perfect combination of sour and salt).  I just LOVE, LOVE, LOVE them.  I don't even buy them because I just can't resist them when they are in my house. 
 
What if I told you that you can make your own version of these sour and salty potato chips that are flavorful, and crispy and are made in your microwave oven.  Well it is true (and not only can you make salt and vinegar chips but you can make pretty much any flavor you want).  They are so easy and really, really yummy.
 
Here is what you will need:
Potatoes (I have used all different kinds-any seem to work) just remember that one potato makes a good amount of potato chips so it is better to peel and slice one at a time.
vinegar (white)
cooking spray
salt (I used a sea salt grinder)
saucepan 
simple slicer (mine is a Pampered Chef brand)
and the most important piece of equipment  A MICROWAVABLE COOKING RACK-I have found them most often advertised for cooking bacon.  I bought mine at a thrift store but you can buy them at Wal-Mart and other stores.


1. Start by slicing your potatoes.  I used the thinnest setting on my slicer.  I love using a slicer to make sure all the potatoes are the same thickness which makes them cook very evenly.  After slicing them put them in your saucepan and cover them with vinegar.  Bring them to a boil and then turn down and simmer until the potatoes are starting to get a bit soft (about 8-10 mins).  Let them sit in the vinegar to soak for about 20-3 minutes (the longer you let them sit the stronger the vinegar flavor will be).  After you have let them soak drain them in the sink and rinse with cold water to remove the excess starch. 

2. Arrange the slices on the cooking rack, trying not to overlap them too much.  Spray the tops with the cooking spray and sprinkle with the salt.  Now place the rack in your microwave and cook until light golden brown.  In my microwave it takes about 5 minutes but if you do just regular chips that you haven't soaked it takes a bit less time (about 4 minutes).  Every microwave is different so set your timer and then check the chips-they will become golden and crispy so if they haven't yet, then put them back in for another minute.  Then you will be able to figure out about how many minutes you will need for each batch.  Thicker chips need longer.  The time is something you will have to play with but they will crisp....I PROMISE.

See I told you they would.  The result is perfectly crispy, sour (but not too overpowering) and salty chips.  Just be careful because if you try to make too many batches your microwave might go on strike (mine did.... it got too hot and shut down for a bit but luckily came back on).  This method is not really practical if you wanted to make enough chips for a large party but  it is perfect for making enough for a dinner, or a picnic, or a snack or for your kids lunch.  My kids LOVE THEM.  I simply can't resist them. 

Want some other flavor ideas?  I have done plain salt, I have done seasoning salt, and  I have done salt and pepper.  There are so many possibilities.  If you try a different flavor, let me know.  I would love to hear some other flavor ideas.
 
Pin It!
Print Friendly and PDF

Jul 15, 2013

Make Monday: Easy Peach Crescent Rolls


 I am going to admit that I pretty much hate having to make breakfast and lunch.  Trying to figure out what to make, the time it takes, the dishes etc.  The biggest of those problems is trying to figure out what to make.  What I usually end up doing it making pancakes or waffles (again) because they are easy and I can't ever think of something else.  Well, in order to combat that problem I decided to come up with a breakfast menu.  Now I used to be one of those people that refused to use a menu because I felt like it was too restricting.  "What if I don't feel like making that" or "what if it no longer sounds good?"  But once I started using a menu for my dinner meals I found that instead of it being restricting it was actually very freeing.  "What do I make for dinner tonight?  Oh let me just look at my menu."  So I decided that I needed to do the same thing for breakfast (and eventually for lunch).  What I did was went through all my recipes, plus added all my usual stand by's and put them into a list.  Then I got a calender and started penciling in recipes-a different one everyday (except cereal , muffins and omelette repeat).  The plan is to go through my list of recipes without repeating until I get through all the recipes, then I will start again.  Now when I start again-some of the recipes won't be repeated (cause they weren't that good) and I will replace those with something new.

So far this has been wonderful-no wondering what to make for breakfast.  The only problem I have run into is that I am not used to prep work for breakfast so I don't always read recipes in enough advance to get things ready and then I am in a pinch to come up with something different.  This recipe is the result of one of those mornings of lack of preparation.  I was supposed to make apple pie fries (which I still want to make because they look so yummy) but I didn't have pie crust ready or bought and so I quickly created an equally delicious breakfast recipe using a can of Pillsbury Crescent Rolls that I had on hand.

The recipe:
1 can Crescent Rolls
1 fresh peach
Cinnamon Sugar
2 tbsp melted butter

Frosting:
1/4 cup powdered sugar
1 tbsp milk
1/2 tsp vanilla

Begin by preheating your oven to the recommended temperature.  Spray your pan with cooking spray.  Peel a fresh peach and slice into 8 slices.  Sprinkle the peach slices generously with cinnamon sugar.  Open up crescent rolls and separate into 8 pieces.  Place one slice of peach on the wide end of the dough and roll up.  Place in pan.  Repeat with each piece of dough.  Sprinkle all of the crescent rolls with cinnamon sugar and drizzle with melted butter.  Bake according to package directions (they should be nice and golden brown).  Remove from oven and let cool slightly while making the frosting.  The frosting needs to be thin enough to pour but not super runny.  You may need to add powdered sugar or more milk (depending).  Drizzle frosting over the crescent rolls.  Serve while warm.  These are sweet and a bit tangy from the peaches.  The cinnamon sugar sprinkled on top give them a bit of crunch.  Very, very yummy, warm and perfect for breakfast.  A great way to dress up ordinary crescent rolls.

Pin It!
Print Friendly and PDF

Jul 1, 2013

Make Monday: My New Favorite Pinterest Recipes

I feel like I should start by apologizing for the lack of content as of late but the truth is that I don't have anything to apologize for.  My life is busy crazy and I just can't get everything done, so somethings get left undone sometimes.  My blog has to take it's turn too.  
Today I just wanted to share a few new favorite recipes.  I am more likely to try a recipe that has been recommended by a friend than I am to try one that I find myself and since I hope you all consider me your friend, I hope you will trust my opinion and want to give these a try too.  

#1. Biscuit and egg casserole.  I know there are a million of these out there.  I particularly loved this one and how easy it was.  I made it overnight and it was a bit soggy so next time I would just make it the day of.  It was delicious completely filled my 8x8 pan I might add.  YUMMY.

#2. Chocolate zucchini muffins.  They really are more like cake that you can get away with eating for breakfast because they don't have frosting (though it wouldn't hurt anything) and they are called muffins.  Really yummy and they do bake up with these pretty domed tops.


#3. Baked pumpkin doughnuts.  I had my hubby buy me a doughnut pan for the oven just so I could make these and they did not disappoint (and neither did the pan-you have got to get one if you don't have one and actually get 2 cause one is not enough).  They have great flavor and texture-even a few hours later and the next day they were still yummy.
crock pot bread

#4. Artisan bread in the crock pot.  This was one of those, "shut the front door" recipes.  Would it really work and would it taste good?  You bet.  Delicious and I didn't have to heat up my house.  Seriously-2 hours on high in the crock pot and then a couple of minutes under the broiler and you have delicious bread that is super crusty on the outside and soft on the inside.  

#5. Mini BBQ chicken pizzas.  I loved the flavor.  I loved how easy they were.  I loved crust.  LOVED them.

#6. Eggless chocolate chip cookie dough bites.  These were really yummy and a huge hit at a backyard movie gathering.  I didn't have mini chocolate chips but it didn't matter.  They are much easier than cake balls but just as pretty and so satisfying.

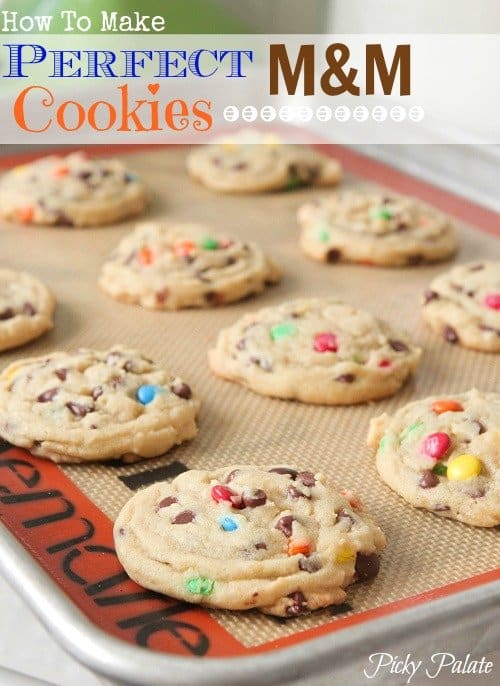
How To Make Perfect M and M Cookies by Picky Palate www.picky-palate.com
#7. M&M cookies.  The recipe gives you lots of great baking tips and these are really the perfect cookie.  They were soft and buttery but not greasy.  So delicious.  Made one batch and another the very next day.  They freeze well too.  

Have you tried a recipe lately that you found on Pinterest that was a big hit?  Please share....oh and happy munching.
Pin It!
Print Friendly and PDF

Jun 7, 2013

Strawberry Shortcake No Bake Cheesecake

This is what I like to call "A delicious accident."  I had company the other night and wanted to make these cake batter no bake cheesecakes that I found on Pinterest but as I got started I found that I didn't have all the right ingredients and then in the process of trying to substitute ingredients plus my common tendency to not read the recipe directions fully, I soon realized that I was not making the recipe anything like it was originally written and so in the process I created my own delicious version of a no bake cheesecake.  Think of a moist slice of french vanilla cake with whip cream and strawberries; those are all the tastes that are packed into one little jar.

Here is the recipe: (this makes enough for 6- 1/2 pint jars)
Crust
1 1/2 cups of crushed graham crackers (this gives you enough to make a thick bottom crust-you can reduce this amount if you just want a thin crust)
1/4 cup butter-melted
2 tbsp sugar

Filling
3/4 of a package of whipped cream cheese (8oz size)
1/2 pint of whipping cream (whipped to stiff peaks with the addition of about a 1/4 cup of sugar)
3/4 cup dry cake batter (I used a french vanilla flavor)
Additional sugar if you want it a bit sweeter

Topping
1 lb of strawberries hulled and sliced
1/4 cup sugar

Start by slicing the strawberries and combining them with the sugar.  Set these aside and the sugar will help to create a nice syrup with the strawberries.  To make the crust, melt the butter and pour over the graham crackers and sugar.  Mix until combined.  Spoon into the bottom of the jars.  I used another little narrow jar to pack down the filling.  Don't bake-just set them aside.  Whip the whipping cream until it begins to thicken.  Add in the sugar (1/4 cup) and continue whipping until it forms stiff peaks.  Now to the same bowl with the whipped cream add the cream cheese and the cake batter powder and additional sugar.  Stir until combined and smooth.  Scoop into the jars.  I used a small cookie dough scoop and then smoothed them out with a spatula.  Then wipe the jar rims for a nice neat presentation.  This makes enough filling to fill the jars 3/4 of the way full.  If you are going to serve these right away, add the strawberries.  But if you are going to serve these later refrigerate them first and add the strawberries right before serving.  A dollop of whipped cream on the top would also be a nice addition.  These don't make a huge serving-had I had enough ingredients I could have trippled the batch and eaten WAY more than a decent sized portion of these.  This is just the perfect amount.  These are not sickening sweet (unless you decide to add additional sugar to each step).  They are creamy, they have that yummy cake taste and the strawberries with the simple syrup are the perfect finishing touch.  A yummy and refreshing summer dessert.  Add blueberries and you could make something really patriotic.  Enjoy.

Pin It!
Print Friendly and PDF

May 20, 2013

Make Ahead Monday: Strawberry & Cream Cheese Filled French Toast Rolls

It's a long name but what it really stands for is: DELICIOUS.  These are almost too yummy to categorize as a breakfast item but I am okay with making that stretch.  I got the recipe/idea from Cinnamon Spice and Everything Nice.  She makes her's with peanut butter and jelly.  We are not PB&J fans at my house so I came up with an alternative filling and it is EXCELLENT-strawberry cream cheese.  
I am going to let you go to the original source for the recipe and instructions but I just wanted to share how I made the filling.  
I used whipped cream cheese spread.  Have you tried this?  This was my first time and I am hooked.  I always seem to have a rough time getting my cream cheese smooth and creamy but this is already as smooth and creamy as one could want.  
I mixed half a container of whipped cream cheese with 1 tbsp of sugar.
Then I added about a 1/4 cup of homemade strawberry freezer jam (you could use any kind of jam).  The amount of jam is totally up to you. I may have added an addition tbsp or 2 as I mixed-I can't be sure.  
Now follow the recipe as it is written only spread the cream cheese mixture on the bread before rolling.  This were easy to make but they take a few minutes to cook so plan ahead.  Also I had a hard time keeping them rolled up before I put them in the egg/milk mixture so I used a toothpick to hold them closed and set something heavy on top of them (I used my rolling pin).  Now for the make ahead part.  I followed the recipe as stated and was able to make 12 rolls.  Place these on a cookie sheet lined with parchment and place in your freezer until firm.  Transfer to a freezer bag and now you have quick and easy breakfast rolls ready to go.  Just pop them in the microwave until soft (but be careful because the center will heat up fast and could burn).  If you take a bit of time one afternoon you could make a bunch of these and have easy breakfasts ready for a while (well unless your family can't resist them and scarfs them quickly).  These are sweet but also have a bit of tang from the cream cheese.  Drizzle them in some warm syrup and you will be in heaven.
Pin It!
Print Friendly and PDF

May 6, 2013

Make Monday: French Bread Chicken Bacon Ranch Pizza

I was feeling a little nostalgic the other day thinking back to my picky childhood days.  I was thinking about it because I now have a fairly picky child and I remember being a picky kid and hating it-mostly people always bugging me about what I did and didn't eat.  I hated having someone give me a lecture every time I went to their house or ate out and I hate having to now defend my child's choices.  She is picky in what she eats people...she is not a bad person.  END OF STORY!!!  I don't think I ever tried to make a big deal of it as a kid and when I went someplace and they served something I didn't like to eat, I just didn't eat it and I ate stuff I liked and went on with life.  And one of the things that I did not eat as a kid was pizza, in fact, I ate my first piece of pizza when I was 21, but my best friends growing up LOVED pizza.  Every time I went to their house for a birthday party they had pizza-pizza buns to be exact.  They took regular bread rolls, put pizza sauce on them and then pizza toppings and baked them in the oven.  I do remember they smelled good but I was never brave enough to try one-if only I had known what I was missing.  Well I am not scarred for not having ate pizza as a kid and I feel like I am pretty normal and now I go through spurts where I feel like I could eat pizza everyday.  Well this day was no exception-I was craving pizza-chicken, bacon, ranch pizza to be exact.  I wanted to be able to have everything I love about this pizza without the time of making a crust from scratch so I channeled my best friends mom and her house as a kid and remembered the pizza buns and created my own spin on that and came up with: french bread chicken, bacon, ranch pizza.

This is the perfect way to get everything you love about pizza but in half the time.  Here is what you will need:
French bread (I used half a loaf which was enough for 3 people though we all could have eaten more)
1/4 cup ranch dressing (may need less for half a loaf)
cooked chicken ( I grill mine and add a little seasoning) I use 2 chicken breasts
3/4 cup mozzarella 
3/4 cup cheddar cheese
2-3 slices bacon (chopped, friend and drained)
1 tomato (chopped)
2-3 green onion (chopped)
olive oil
Begin by slicing the bread in half and brushing each side with olive oil.
Place the bread on a cookie sheet and put it in the oven under the broiler until slightly toasted.  This step helps to keep the bread from getting super soggy with the addition of all the other ingredients.
Now spread each piece of bread with the ranch dressing.  Sprinkle with the mozzarella cheese.  Add the chicken, bacon, tomatoes, and onions.  Sprinkle the top with the cheddar cheese.  Place in an oven preheated to 450 degrees and bake for 10-15 minutes or until the cheese is melted and the top is toasted to your liking.  What you end up with is a crispy, light crust with all the pizza taste you could ask for.  The flavor was incredible and it was so quick and easy.  In fact I have been tempted to make this for dinner 4 or 7 days this week but resisted because it isn't that low calorie for sure.  Next time you are in the mood for pizza without all the pizza work give this a try: French Bread pizza.   I think you are going to love it.

Pin It!
Print Friendly and PDF

Mar 11, 2013

Make Monday: Cactus Nachos

I guess I am too late posting an amazing Superbowl must have recipe so I am going to say that these are perfect for watching endless hours of March Madness basketball (isn't it ironic that March is national crafting month and also the month of endless college basketball?  Nothing like, "you do your thing honey and I will do mine."  I digress).  Cactus Nachos-cheesy, bacony (a new word for bacon lovers), spicey, did I mention cheesy?  A super yummy alternative to regular old nachos.  These are inspired by Boston Pizza Cactus Nachos.  I don't know if you can find them in the USA but you can find them in Canada and they are delicious.  Here is my version.

For this recipe you will need:
2 large potatoes (I use Russet)-or enough to cover 1 full sized sheet pan with slices
Cheese
3 or 4 slices of bacon (chopped)
Green or white onions (chopped)
Green peppers (chopped)
Salsa
1. Start by slicing your potatoes thin-but not too thin.  You don't want potato chip thickness-you want them to be thicker than that.  I use my Pampered Chef Simple Slicer on setting 3 (if you don't have one of these then you need to get one at the next Pampered Chef party you are invited to-so fantastic for slicing potatoes).  Okay so scrub your potatoes, slice them and then lay them on a parchment lined cooking sheet drizzled with oil.  Then drizzle oil all over the potatoes and sprinkle with salt and pepper, or something spicier if you have it and want it.  Bake in the oven preheated to 425 until they begin to turn golden brown (20-30 mins).  You want them as crispy as you can get them without burning them.  While these are baking fry up your bacon bits with the onions and peppers until the bacon is crispy.
2. Remove from the oven and transfer to a oven safe plate (the larger the better).  You don't want them overlapping that much.  The more they overlap the soggier they will be in the end.  Mine were a bit crowded but this was the biggest plate I had.
3. Now top with cheese
and bacon/onions/peppers
and salsa (and more cheese if desired)
3. Now put the whole plate back in the oven under the broiler until the cheese is melted and bubbly.
4. Now for the BEST part-eat.  There are usually some that are a bit soggy from the juice from the salsa but so far it hasn't ever seemed to deter my husband or I from eating
and eating
and eating some more.
Cactus nachos-they are an excellent appetizer but they also make a great meal. They would be perfect for the big game, or sleepovers, or a movie night.  Customize them how you choose.  Who knew potatoes could be the new nacho?
Pin It!
Print Friendly and PDF

Feb 4, 2013

Make Monday: Easy and Delicious Chicken Parmesan


Chicken parmesan-have you had it?  Oh yummy heaven.  But did you know it does not only have to sit on a plate along side spaghetti or some other form of pasta.  It is a perfect pair with pretty much anything and everything and since this recipe is super easy and fast to make you can have it any time you want.  

Here is what you will need (for 2 servings)
1 large chicken breast (I am talking a big fat one because you are going to slice it in half giving  you two thinner breast pieces.  If you don't have a big fat one then use two small chicken breasts)
3/4 cup Panko bread crumbs (if you haven't ever used them-start with this recipe)
2 tbsp parmesan cheese (you can use the fresh, but I never have it on hand so I use the canned stuff-DON'T JUDGE-it still tastes great)
1 tsp salt
1/2 tsp pepper
1 egg
2 tbsp water

Start by mixing all your dry ingredients in a shallow bowl.  Mix the egg and water in another shallow bowl.  Slice the chicken breast in half horizontally to give you two thin breast pieces.  Place these in a bag and pound them with a meat mallet (don't skip this step-it makes the chicken super tender and helps it cook twice as fast).  This is a good time to take out any frustrations for the day.  Now pour enough oil into a nonstick pan to coat the bottom generously.  Turn the burner on to a medium high heat and heat your oil.  You want it to be hot before you add the chicken.  Wait until the oil is feeling hot (when you hover your hand over it) and then take the chicken pieces, put them in the egg wash and then into the crumbs (coating them very well on both sides) and then into the oil.  Repeat with remaining meat pieces but don't over crowd your pan if you are cooking a bunch.  DO NOT turn the chicken until it is golden brown on the underside.  Turn and cook until the other side is golden brown too.  If you have pounded out your breasts thin enough they should be cooked thoroughly at this point.  If you are unsure, test with a meat thermometer (they should read at least 165 inside the thickest part).  Remove from the pan.  You can pat them with a towel to remove any excess oil and then serve.  They are crunchy, tender, juicy and flavorful.  We eat these a lot with spaghetti and sauce but they go well with potatoes, rice, veggies and even potato chips (for a quick lunch option-again DON'T JUDGE-we have had a rough week at our house).  Try it.  It is the easiest way I have found to cook chicken and results do not disappoint.
Pin It!
Print Friendly and PDF

Jan 28, 2013

Make Monday: Lime Chicken Quesadillas


During my years as a Family and Consumer Sciences teacher I created a yummy recipe for lime chicken taco salads that were a big hit with my students.  This recipe is inspired by those yummy salads which have been on my mind lately.  I love to cook but I have to say that I HATE making lunch.  Seems like I just finished making breakfast and I have been planning what to make for dinner and then lunch time arrives and I can't think of a thing to make.  My kids would be happy with mac and cheese and chicken nuggets every day but I would feel like the worlds worst mom for feeding them that everyday so I have to throw something else in at least a few times a week.  Luckily for me they love quesadillas.  

So here is my easy lime chicken and pinto bean quesadilla recipe:

1 can chunk chicken (I use the small can but if you are making lots of these you could use a larger can)
lime juice (1-2 tbsp)
1/4 tsp red pepper flakes
1/4 tsp garlic salt
salt and pepper to taste (but use more pepper than salt)
pinto beans
grated cheese
additional toppings as desired


Start by emptying the can of chicken into a bowl and mixing in the lime juice, red pepper flakes, garlic salt and then salt and pepper and let that marinate for a minute.  If you don't want the spice omit the red pepper flakes.  If you want more of a lime flavor-add more lime juice.
Then simply assemble.  I spread my beans, add on the chicken, cover with cheese, sprinkle on some chopped green onions (those were an after thought so I didn't get them in the picture) and a few dollops of guacamole.


Then fold it in half and place on a hot grill sprayed with cooking spray.  Spray the top side of the quesadilla too with cooking spray.  When golden brown, flip it over and cook it on the other side.

Remove from heat and cool for just a couple of minutes then slice.  Super yummy flavor and it only takes about 5 minutes to prepare.  Now that is my kind of lunch.


Pin It!
Print Friendly and PDF

Jan 21, 2013

Make Ahead Monday: Freezer Bread Revisited


I know I haven't done Make Ahead Monday posts in forever but I have gotten so many e-mails and comments about this particular post that I thought it would be a great way to get me back into the the Make Ahead Mode (listen-right now there isn't time for making much of anything in my life...I am in more of a "go to Burger King for fries and nuggets" mode but the Make Ahead lifestyle is much better so I have to get back into it). 
A while back I posted about making and freezing bread dough to thaw over night so that you could bake it in the morning.  I didn't however include the recipe which was kinda dumb but I guess I just figured people would use whatever bread recipe they wanted.  But every comment or e-mail I have received about this post asks for the recipe so I am reposting the original along with the recipe this time.
And just in case you are wondering if the recipe is good or a keeper I included a scan of my own original copy (you can rest assured it is tried and true):

As you can see it is very well used.
So here is the legible version (and now mom you can look here for your own bread recipe instead of calling me for it).

2 Cups Mashed potatoes (or 1 cup potato flakes)-if you happen to mash your potatoes with sour cream those left over potatoes in this bread are really yummy.
5 cups water (125-135 degrees)
2/3 to 3/4 cup sugar (I used 3/4)
3/4 cup oil
2 1/2 Tbsp salt (I used Kosher)
3 T quick rise yeast
3 Tbsp vinegar
7 cups flour (I use part whole wheat usually and when I do I add 1/2 cup wheat gluten as well and add a bit extra yeast)
4 eggs

Add potatoes, water, sugar, oil, salt, vinegar, eggs and 1/2 the flour to your mixer.  Sprinkle the yeast on top of the flour (not directly into the water).  Mix using a bread hook (of course).  Continue to add remaining flour (I honestly don't know how much I use because bread making isn't exact-it is more of a "by feel" experiment.)  When you have a dough that pulls away from the edges of the bowl, is not super sticky but is still quite soft stop your machine and cover the bowl with a towel to rest for 10 minutes.  After the rest,form your loaves or rolls and place in greased pans.  This is where you would freeze the dough (see the original post for instructions).  Let the dough rise until doubled in a warm location (I like in a window, out on the back steps in warm weather, in the oven after it has been slightly warmed or by the fire).  Bake at 350 for 20-25 minutes or until golden brown and sounds hollow when tapped.  Take out of the oven and cool for just a minute in the pans and then turn out onto cooling racks to finish cooling.  You can also freeze baked loaves which works good as well but not as good as fresh baked.

Bread baking requires practice and some trial and error.  If you are a first timer I am not going to tell you that you can't screw this up because the truth is that you can...you can screw up any bread recipe.  So pay attention to what kind of yeast you are using, your water temperature (use a thermometer) and remember that a soft dough produces soft bread.

I hope this helps all of you that want to try the make ahead freezer bread method.  Just remember that frozen bread dough needs a nice warm place to rise.  Happy baking...and eating.


Pin It!
Print Friendly and PDF

Jan 9, 2013

You, Me and a 6 Pack-Valentines Cupcake Box


One of the recent items that Wholeport sent me was this fabulous cupcake box:


At $1.99 a piece I think these might become a staple supply in my house because they are so fun.  I covered mine with scrapbook paper and added an argyle pattern to the front with paper and paint.  I created a super simple tag.  If you would like I have included a link to it at the end.

I tried to think of a perfect occasion to give someone a box of cupcakes and what better holiday than Valentines Day.  Wouldn't it be fun to send a picture of this to your hubby or boyfriend while he is at work, or have it on the table Valentines Day morning, or have it delivered to him at work.

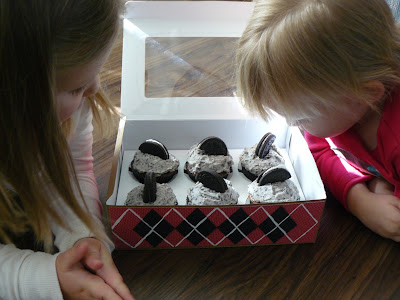
 The cupcakes are chocolate with Oreo butter cream frosting.  Recipes can be found here and here.

 These wouldn't only work for Valentines Day.  You could send someone a "sixpack" with a note saying, "Heard you had a hard day.  Maybe a sixpack will help" or "Congratulations.  Here is a sixpack to celebrate."  There are lots of possibilities.  See-that is why you need lots of these boxes on hand.

Onlookers/droolers.  They said any daddy would love these cupcakes (kids too).

A sweet, and romantic way to celebrate Valentines day.


Also shared here:

The 36th AVENUE
Pin It!
Print Friendly and PDF
Related Posts Plugin for WordPress, Blogger...