

I saw this idea in an old issue of Paper Crafts Magazine and as is the case in so many magazines, the things that I like don't have good instructions. So I just looked at the picture and came up with a tutorial myself. I think these would make great take home gifts from a Birthday party or could be used as center pieces. There are lots of possibilities. Also you could make them bigger using a larger paper bag or smaller too. I used a regular lunch sack sized paper bag. One thing I did learn while making these was that not all paper bags are created equal. They all have their little quirks.

 This is how it will look after being trimmed.
Step #2 Cut your paper pieces. You will need 2 sets (one for the front and one for the back). I used card stock for all of my pieces.
Bottom layer: 4 x 5 1/8", Top layer: 3 3/4 x 4 7/8", Paper Stripe 5 1/8 x 3/4"

 I also used a piece of adhesive ribbon (Martha Stewart brand). If you are using ribbon you will want it to be a bit longer than the bottom layer so that it can wrap around the back side.
Step #3 Apply double sided tape to the back side of the top layer and center it on the bottom layer piece.

 Step #4 Apply glue to the back of the paper stripe and glue it in place about a 1/3 of the way up from the bottom or where ever you like it.
 Step #5 Place the ribbon in the center of the paper stripe and wrap the ends around to the back side.

 Use your first set as a guide to assemble your second set.
Step #6 Choose one set to be the front that you can add some embellishments to. You can do anything to embellish the front of these. I stayed pretty simple as I probably will just have these in my craft room for a while with no place to use them yet. I did buttons. I choose 3 different buttons and arranged them on the front.
I used my large needle to poke holes for attaching the buttons. Once the holes were poked I used my wax coated thread to tie the buttons on.

 Step #7 Apply double sided tape to the back side of the set and attach it to the bag. Repeat to attach the other side also.
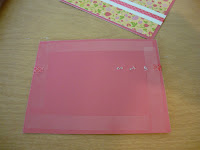
Step #8 If you want to make a bag that will be sturdy then do this step; if not skip ahead to attaching the handle. To make the side inserts cut 2 pieces of white card stock 4 x 3". Slip these into the sides of the bag.


Step # 9 Cut a piece of card stock for the handle 1 x 11". Fold under about a 1/2 " on each end.

I attached mine with eyelets, but you could use a large brad, or if you are mass producing these a staple would work great too. Center the strap in the middle of the side of the bag. If using eyelets, punch a hole in the middle of the handle side piece and attach your eyelets.


 And tada, you are finished. Here are a couple that I made. There are lots of possibilities with these. Aren't they cute and so easy. Enjoy!!!


I love this idea! This is going to make a great gift bag for my niece's birthday gift this month, thanks! I'll be linking.
ReplyDeleteI just found your blog and I love it! This idea is awesome. I would love to post it on my blog on Friday :)
ReplyDeleteThat's adorable! What a cute and fun idea for a child's B'day party. Thanks for sharing!
ReplyDeleteOh this is adorable!! I am going to have to try this with felt I think!! Awesome!
ReplyDeleteAnjeanette
I love this idea!!! I was just wondering if they could hold something (like using them as gift bags)? I was thinking these would be adorable Easter gift bags. Thanks!
ReplyDeleteI think I'll do some smaller versions of these to hold brads, eyelets, buttons, ribbon, etc. in my craft room! SUCH a cute idea! I am new to your site (referred by Twiddle-Thumbs) and am loving all the purses! Your little girl is a cutie, too!
ReplyDeleteThose are adorable and going to be perfect for my daughter's upcoming birthday "loot" bags. Thanks for the tutorial!
ReplyDeleteSo cute! Thanks for sharing the instructions!
ReplyDeleteWhat a cute idea!
ReplyDeleteThat is way cute!!! What a good idea for my daughters birthday.
ReplyDeleteI'm going to attempt this then put a floral foam in it & make it our spring centerpiece! :) Will definitely be linking to you!
ReplyDeleteTFS the tute. Very cute.
ReplyDelete