Showing posts with label Sewing. Show all posts

Aug 5, 2013

Get Your Crap Together Back To School Pattern Pack Review

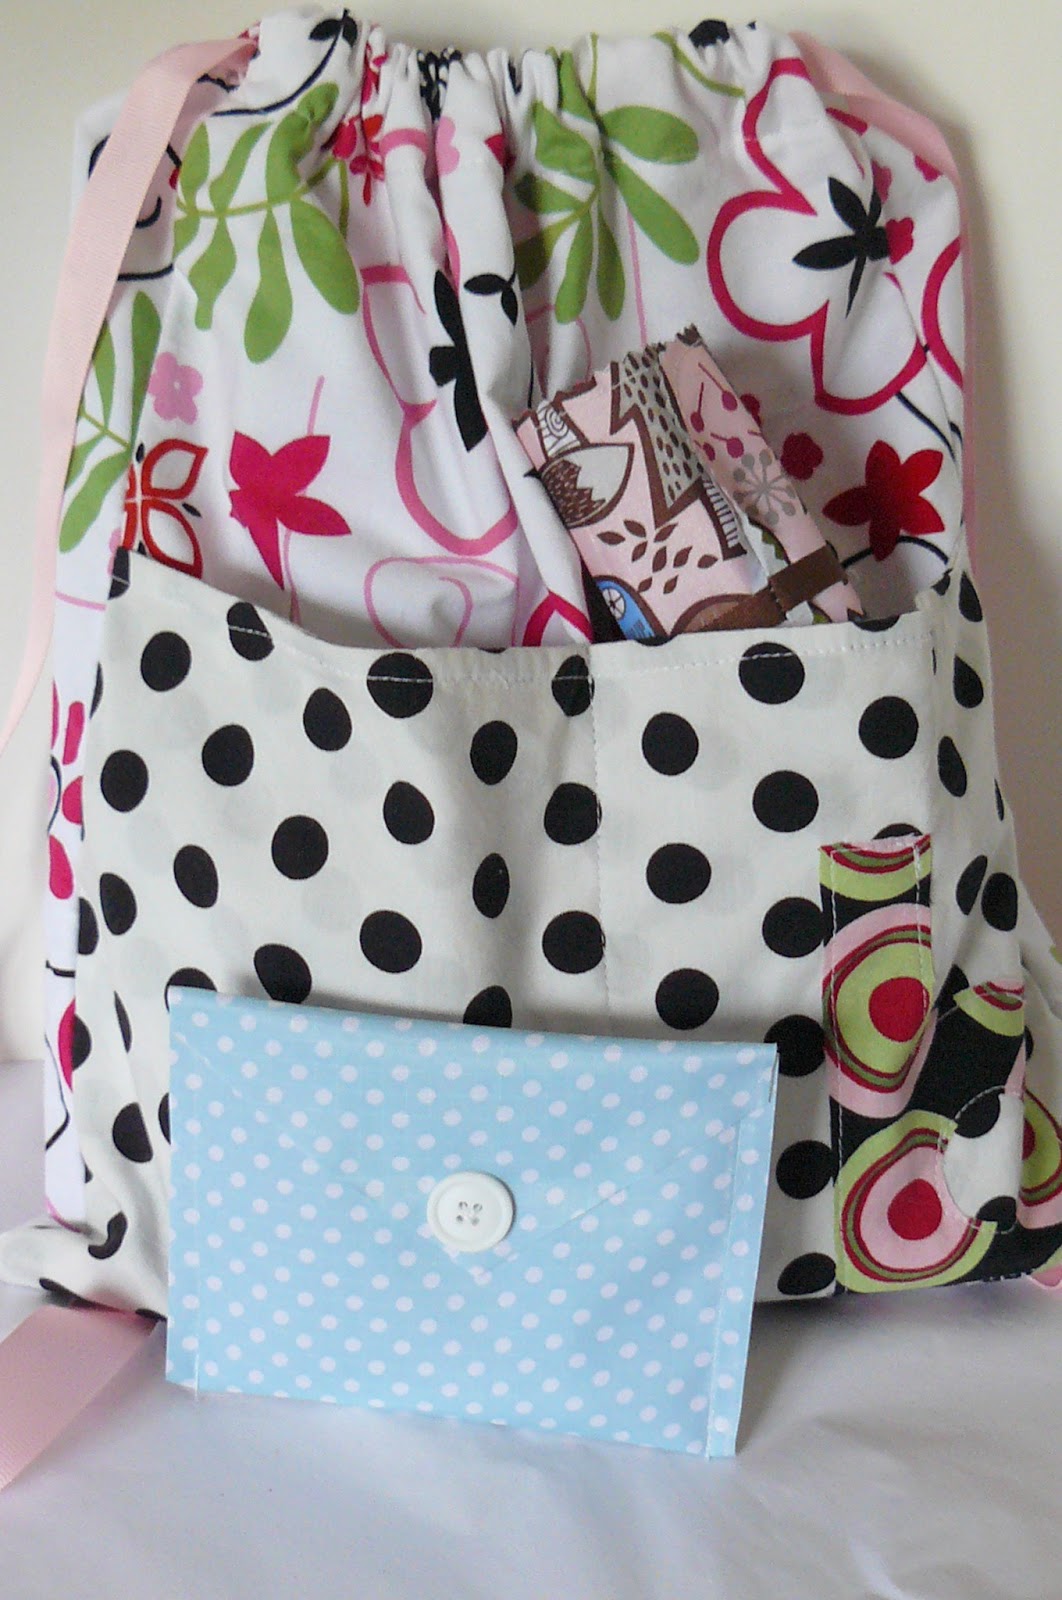
I am happy to be a part of Get Your Crap Together's Back to School Bus Tour.  Thanks for stopping by.  Today I wanted to share with you some fun and cute back to school projects I made using the patterns from the Back to School Pattern Pack by Get Your Crap Together.  I chose to make the backpack sack, the crayon roll and the snack bag but the pattern pack has 9 different easy patterns to make including a lunch bag, art kit, sandwich bag and pencil pouch.  
 For the crayon roll I used waterproof fabric from Wholeport.  I made the crayon roll to hold our dry erase crayons and using the waterproof fabric makes it extremely easy to wipe clean.  And because I used this fabric I made it a tiny bit different and didn't have to enclose any seams.  I just pinked all the edges (though the fabric doesn't unravel).  The pattern was really easy to follow and super simple.  I made 2 in a matter of 10 minutes.
 I did a church quiet book making party at my house and showed them all my wipeable crayon roll and every mom loved it.
 I also made a snack bag using the same kind of waterproof fabric.  It is also super simple to whip up.  I wanted mine to have a very secure closure so I added extra Velcro to help it stay closed. There was also no need to enclose the seams on this using the waterproof fabric.  Super Simple.
 For the backpack sack I lined my sack to make it a bit more durable.  We are going to use them (I made one for each of my girls) for church bags and there are usually a lot of books involved so I wanted them to be really sturdy.  I love how the backpack sack has the outside pocket to help keep track of smaller items. And it is the perfect size for my girls.
I was really impressed with how fast and easy all of these projects were.  They would be great for school, church, birthday gifts, sleepovers, and the list goes on.  There are some really fun patterns included in the Back to School Pattern Pack.  Thanks so much Get Your Crap Together

Want to check out what other crafty bloggers have done with the pattern pack, this Bus Tour link button will take you where you need to go.

Get Your Crap Together
Pin It!
Print Friendly and PDF

Aug 2, 2013

"Sweet As...." The Girl Series of Up-Cycled T-shirt Bibs


Lest you think that the only thing I know how to do these days is throw things way, I thought I had better put a crafty post up just to make sure that you know that I still know how to strut my crafty stuff.  I just got finished with my girl series of up-cycled T-shirt bibs: The "Sweet as....." series.  I love the bright colors.  I love how they all turned out (you know how some things just look better when you take their picture).  On these ones I sewed all the details in white because the appliques all required multiple layers and it would have just been impossible to continually switch the thread.  Here is a closer look at each.

Cotton Candy

Chocolate Cupcake

Watermelon

Strawberry

Popsicle (cherry flavored of course).

 In case you missed the first series (the "Hungry as...." boys series) check it out here for a tutorial on how to make these easy and adorable t-shirt bibs.  

Now what little girl wouldn't look SWEET in these?


Also shared here:

504 Main

Happy Go Lucky
Pin It!
Print Friendly and PDF

Jul 11, 2013

More Up-Cycled T-shirt Bibs

I recently shared these bibs with you and love how many people have pinned them and stopped by to check them out (I would love it even more if some of those people clicked my "follow" box....but I am not going to be picky about it).
I just wanted to share a few more bibs I have added to the collection (this time I added an infant size):


 And I also created these to sell at our local watermelon festival.  These are also made out of up-cycled t-shirts.  I am busy working on the girly set now so stay tuned.
Pin It!
Print Friendly and PDF

Jul 9, 2013

Easy Sleeveless Dress Refashion

In our house we don't do sleeveless.  I am trying to teach my children right from a young age to dress modestly, which in our home, means no sleeveless clothes.  But we get a lot of hand me downs (which I am so grateful for) and often times they include really cute sleeveless sundresses and tank tops.  I let my girls wear these with a t-shirt under them and I think they are so adorable.  But I wanted to create a way to just add a t-shirt already to these cute sleeveless pieces to make them into an "always modest" piece of clothing.   So I came up with a SUPER easy way to turn a dress like this:
into this:

 What you need for this project is your sleeveless item and a t-shirt that coordinates.  It is important to try and keep the sizes similar, so that they fit better.  I found t-shirts that worked at our thrift store.  You are only going to see the top and sleeves so it doesn't even matter if it has a design on it.
What you need to do first is place the t-shirt under the dress or top (how it would look if your child was wearing it).  Pin this in place.
 I pinned along the front of the dress and the back.
 I pinned on the straps on top of the sleeves and under the armpits.
 Next it is important to choose a thread that matches the stitching already on the dress or top.  In this case the stitching was pink so that is what I chose.  Now you need to stitch.  I look for places where I can sew so that the stitches would be hidden.  I stitched along the front just below the top hem.
 Then I stitched under the armpits (only about 2 inches) again just below the hem.  This keeps the sleeve from popping out.
 Then I sewed along the back.  This had a bit of gathering so I stitched just below the last row of gathering stitches.  If your thread matches pretty close then it is really hard to even tell where you did it.
And lastly I sewed along the straps.  I sewed along only one side of the strap (about an inch of stitching) because that is where the stitching was on the dress.  I don't sew along the whole thing because I don't want to completely change the fit of the dress.  Sewing just a few stitches makes everything lay the way it normally would if you were to just wear a shirt under the dress.
 Lastly you will want to cut down the shirt under the dress.  Pull out the t-shirt flat and
 trim so that there are only a few inches hanging down below the lowest stitching that you did.  Because you used a t-shirt then you don't need to worry about it unraveling.  Knit is perfect for projects like this because it doesn't unravel.
 And there you have it.  A really easy, inexpensive fix.  It takes only a few minutes and a sewing machine.  It was so much easier than I expected.  I was able to do this in about 10 minutes.  It is not like it is that hard to wear a shirt under a sun dress or something but now it is a complete and modest outfit and my daughter was excited because it was like something "new" all over again.
 These are the other ones I did quickly one afternoon:

Now there is no need to worry about an outfit that is sleeveless-you can easily turn it into a new, modest, fashion piece.
Pin It!
Print Friendly and PDF

Jul 2, 2013

Hungry As A....Up-cycled T-shirt Bib Tutorial


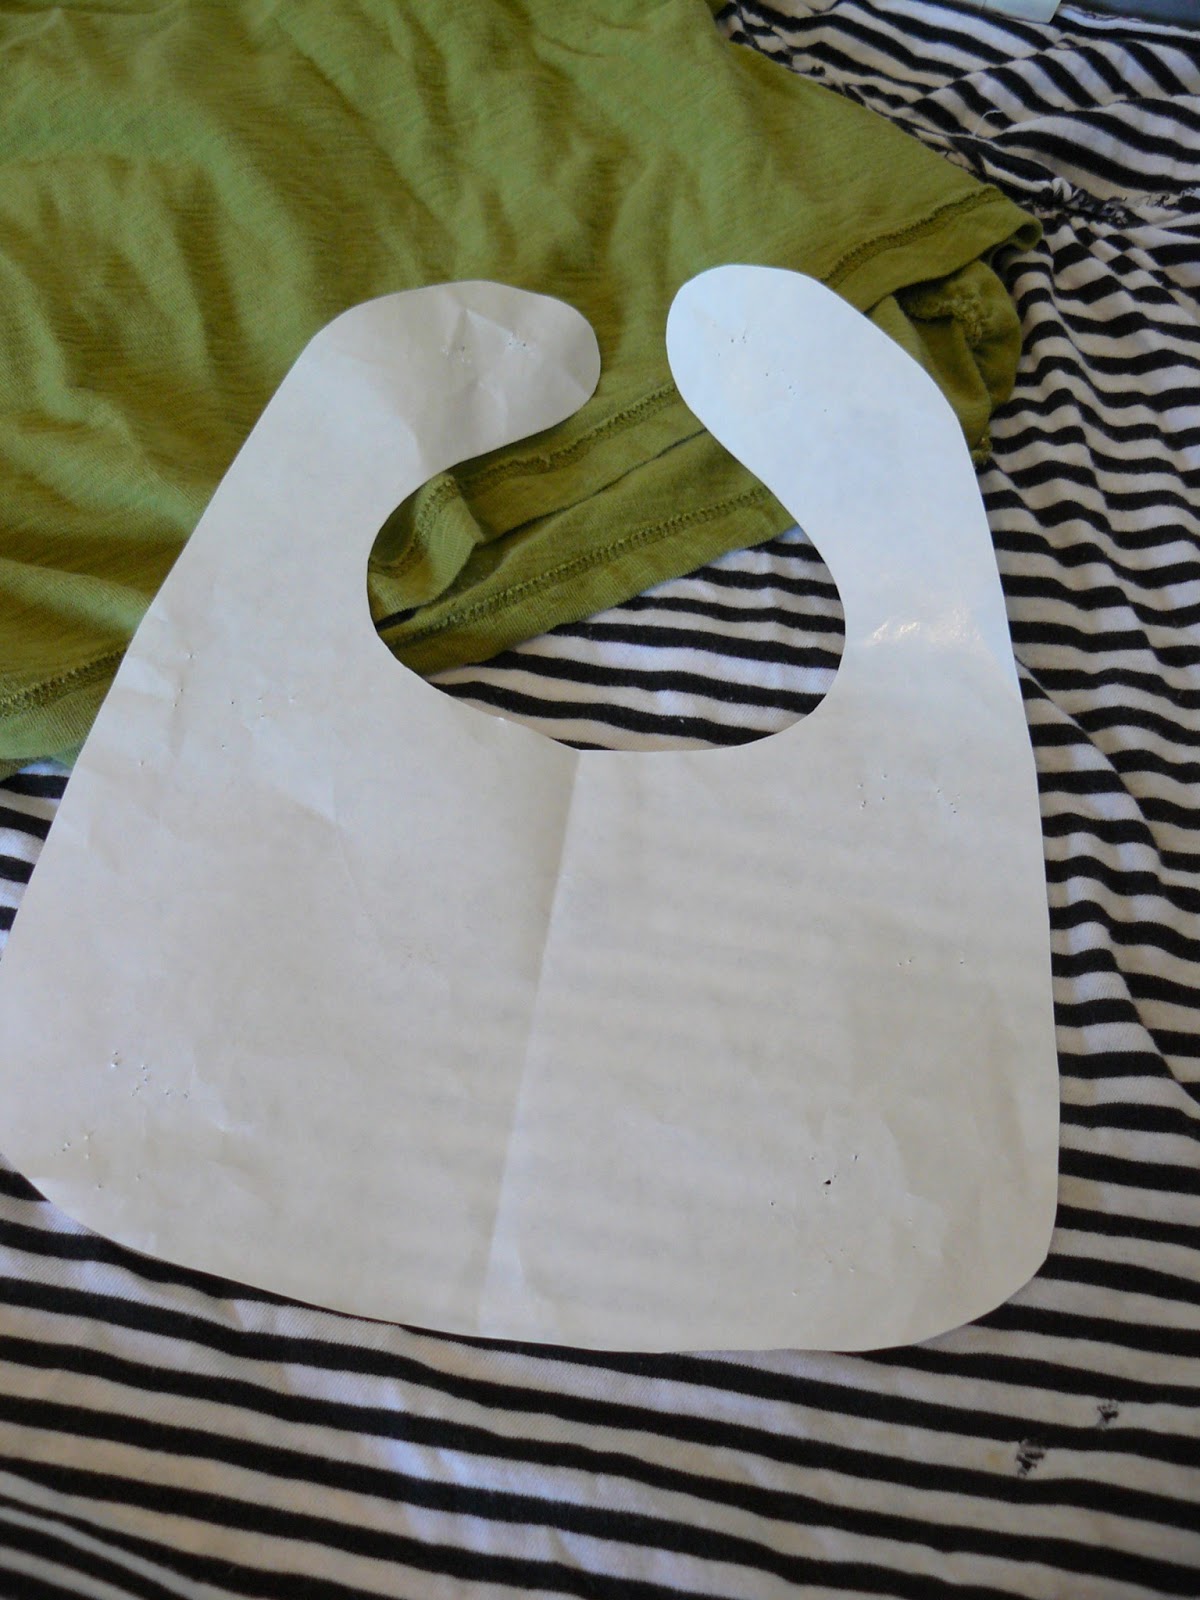
Okay-these are my new favorite thing.  If I could make a living off of making and selling these I would do it in a heart beat.  They are so easy to make, the possibilities are endless and they are ADORABLE.  I call this series my "Hungry As A..." series.  I have another one in the works for a girl, "As Sweet As...." Stay tuned for those.  To make these you will need 3 t-shirts (I only have 2 in my shot because I forgot I needed a third when I took the picture) and a bib pattern.  I made mine up but you could copy one that you like or send me a message and I will send you a copy of mine.  This size of a bib is perfect for a 1 year old-18 month old.

You want to cut out your pattern through both layers of your printed t-shirt first. and then through 1 layer of a contrasting shirt.
Sandwich the contrasting layer between the two colored layers.  The colored layers should be right sides out.
Before you sew you will want to sandwich a piece of elastic (2 inches long) in between the layers on each side of the neck bands.
Now sew around the bib (catching the elastic when you sew over that part).  Sew a second row of stitching just for looks.
Now pick any design that you would like to add to your bib.  I search on the Internet for clipart that I can trace and turn into a design.  I trace this onto Wonder Under (by Pellon) and then iron it onto the wrong side of another contrasting t-shirt.
Cut this out, peel off the backing paper (it is so simple) and iron it onto your bib.  Then sew around with a contrasting color.
It just so happens that I picked THE HARDEST image to sew to use for my tutorial.  If you are a beginner at applique-don't pick an alligator.  Too many bumps.  In the end it turned out great.
And that it is it.  The bib is soft.  It has enough layers that stuff won't just immediately soak through (though I am not saying it is totally mess proof).  It is cute and totally cool and one of a kind.  Like I said-I love how it turned out.

And here is the whole set:

T-Rex
Moose
Alligator
Bear

Wouldn't these look so cute on your hungry little guy?

Also shared here:

Today's Creative Blog


Pin It!
Print Friendly and PDF
Related Posts Plugin for WordPress, Blogger...