In case you missed my guest post at
Someday Crafts, I thought I would share it here on Small Fry. For my guest post I shared a tutorial on how to make a easy peekaboo carseat cover from a receiving blanket.
I know we are approaching spring and summer which are not exactly carseat cover weather but this tutorial would be great for people that are expecting babies in the fall, or to make as a gift for someone else. For those who live in places where the weather is still chilly this might be just what you need right now. So here it goes.
To make this you will need:
1 receiving blanket (it needs to be either a thick fleece one, or one that is made from two layers of flannel. You want the material thick so that it will be warm. I guess you could make one out of something more light weight if you wanted it for the spring).
3/8" elastic (52" long or slightly longer or smaller depending on the carseat)
2- 3" pieces of 1/8" elastic
Ribbon if you want to add the ruffle to the opening
1. Begin by measuring your carseat. All carseats are not created equal so if you are making this for yourself or someone you know it would be a great idea to measure the carseat to be sure you make it fit. If you are making this for a gift and are unsure you can use my measurements. My carseat is a larger model so you should be safe knowing that it won't be too small. You want to measure from the top, down (keep it snug).
Make sure you start your measurement down under the edge of the top of the carseat because this is where you want your cover to start.
You want to end your measurement down and under the edge at the bottom too. For my measurement I got 32".
2. Now measure across the widest part of the carseat, again curving around the edges.
My measurement was 21".
3. Now take a large piece of paper (I used two pieces of freezer paper taped together) and mark from the top of the paper down your first measurement (the length of the carseat-which I got 32").
4. Take your paper and fold it in half and mark on the side half of your width measurement. I had 21" total so mine would be 10 1/2". Now draw a line that goes from your top mark out to the side mark and back down, forming a half oval. Cut on this line. This will leave you with an large oval pattern.
5. Next take the blanket you are going to use and spread it out.
6. Pin the pattern to the blanket.
7. Cut out around the pattern.
8. Lastly, before you can start sewing you need to find the circumference (basically) of the carseat to cut your piece of elastic. I did this by stretching my elastic all the way around the carseat, stretching fairly tight (as snug as I would want it to be on my cover). My measurement was 52". If you got something much higher than that, you probably weren't stretching your elastic enough. Trust me.
It is hard to stretch elastic and take the picture at the same time, but make sure you allow the pieces to overlap slightly.
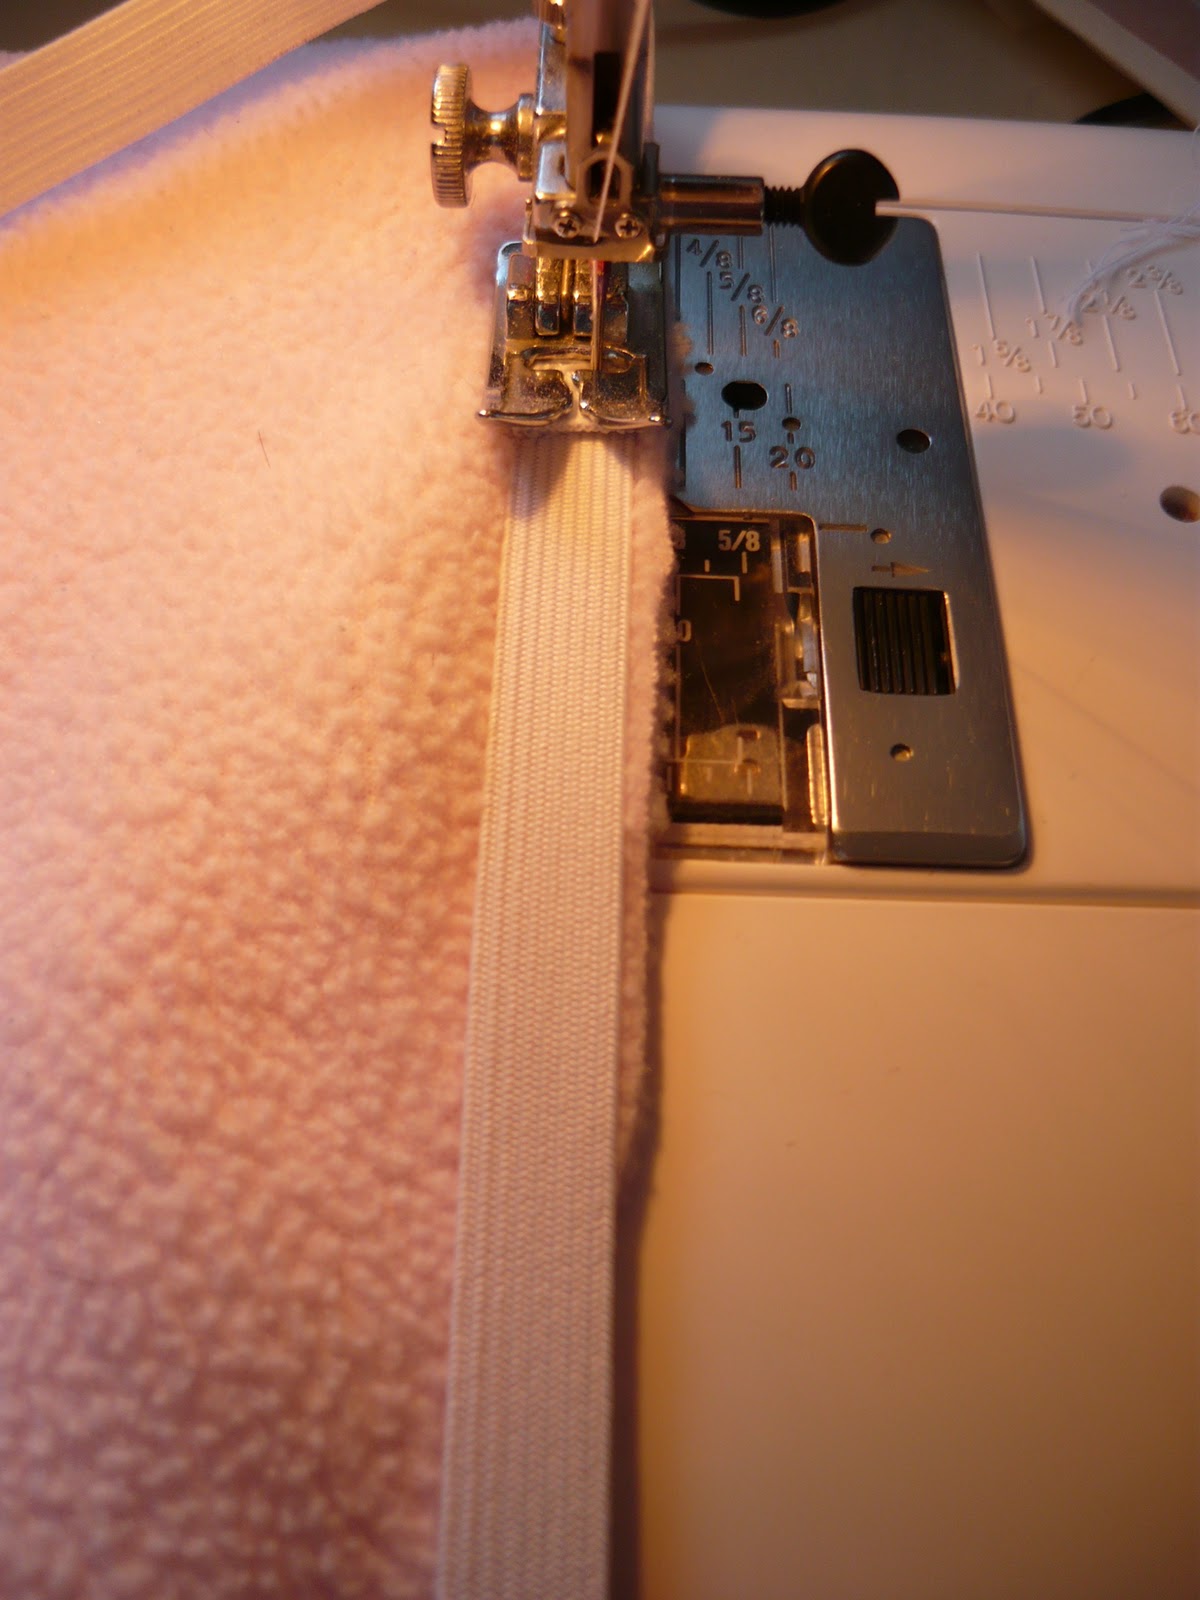
9. Now begin by first stitching the ends of your elastic together (make sure one piece is not twisted). I used a zig zag stitch.
10. Place this elastic on the edge of your cover piece, on the wrong side if there is one. NOTE: if you are using flannel or a fuzzy material that frays, then you will want to either serge or zig zag stitch around the edge first before adding the elastic. Take a couple of stitches in the elastic (again using a zig zag). When you stop make sure that the needle is down in the fabric.
11. Now as you continue sewing you will want to hold and guide the fabric with one hand while you stretch your elastic with the other. I don't pin before hand because it is much too difficult. Stretching and sewing is the way to go, just make sure you are really stretching your elastic. Anytime you have to stop just make sure your needle is down otherwise you will pull the whole thing out when you start stretching your elastic again.
12. You will know you are stretching the elastic enough because the edge of the material should bunch. Stitch all the way around and backstitch where you started.
13. It should look something like this when you are done.
14. When you put it on a carseat it looks like this. It should fit snug and not sag in the middle.
15. Now you will cut out the peekaboo hole. To do this you will need to draw a guide for your cutting line. You can eyeball this if you like or measure in from the sides and make a little mark. Mine measures in about 4 inches from the side of the carseat, when the cover is on the carseat. Draw a curved line from one mark to the other. Don't make it too big because the idea is to "cover" the baby and keep him or her warm.
16. Cut on the line. I start by poking a small sharp pair of scissors through the material (you could use a seam ripper too) and take one snip. Then finish off with your regular fabric scissors.
17. Now to keep the peekaboo flap closed most of the time you will want to add some way to fasten it. Before doing this, if the material you are using frays or sheds then you will want to serge or zig zag the edges of the flap and the opening. To create a way to hold the flap closed I used to 3" pieces of elastic.
Fold the elastic in half (to form a little loop) and sew to the under side of the flap about 2 1/2" down from the center on either side.
18. Sew small buttons on the cover piece to correspond with the loops.
Now it can close like this.
Or you can have one side fold down if you wish.
Now technically that is it. But it wasn't very cute so I decided what it needed was a ruffle. This is a simple embellishment. I made mine using a piece of ribbon that was about 6" longer than the opening and a second piece about 6" longer than the flap. I sewed a basting stitch down the center of the ribbon, pulled it to gather it into a ruffle, folded under the ends, then pinned and sewed it with a regular stitch. (HINT: don't use too thin of a ribbon or you will have a tough time sewing it without all the ruffles folding under. Use at least 3/4" ribbon) This can be done before adding the elastic or buttons, but honestly I didn't decide to add it until I had the fasteners on. I love how it looks with the ruffle.
Then if you wish you can add an embellishment to the cover as well. I felt like it needed something so I cut 3 flowers, in varying sizes and sewed them in place and added a yo-yo flower to the center. You could do all kinds of things though.
Here is a second one I made.
Now I realize ruffles don't exactly work for boys, but don't worry I have an idea for a boy cover as well. Join me on my blog on March 22nd to see the boy version of this carseat cover. Until then, happy sewing and repurposing.


Thanks for it. You make it sound soooo simple. Can't wait to try
ReplyDeleteThis is great! Thank you! I am new at sewing (given a singer esteem II by my mom last christmas) and am expecting a baby in 3 weeks! I've been scouring your posts and making many of your items. THANK YOU for the great instructions - it has really made it easy for me as a new seamstress to understand the workings of sewing!
ReplyDeleteWow this I'd fabulous! Just found your tutorial via tip junkie and I want to make one for my little guy that I am expecting in November. Thanks for sharing!
ReplyDelete