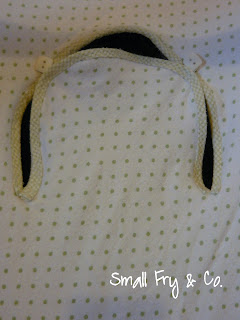
This is a follow up to the guest post I did at Someday Crafts featuring a tutorial on how to make a peekaboo carseat cover out of a receiving blanket. In that post I promised to share a boy version.
This is my boy version of the carseat cover.
For most of the instructions you will want to refer to the original post. This is specific to making a carseat cover out of a flannel receiving blanket.
1. Lay out your receiving blanket and pin the pattern as shown. Notice that it is over to one side as far as it can go. That is on purpose.
2. Cut out around your pattern. Notice that there is a piece left after cutting-well let me back up, cut so that you will have a piece left like the one shown (the large corner piece). From that cut 2 1 1/2" strips. This is a receiving blanket made out of 2 pieces so that back and front are different. You can choose which you want to use.No I did not use a ruler, pattern or rotary cutter. I eyeballed these. You can too if you like.
3. You will want to refer to the instructions on the original post about making the carseat cover and cutting the peekaboo hole. After you have done that, zig zag or serge around the edges. Notice how after you have sewn that material looks lumpy...
but if you press it with an iron and a little steam it goes back to this (which is what you want).
4. Now take your strip and
press it in half lengthwise.
Now open it up and...
fold one side towards the center crease and then fold the other side towards the center, then fold in half.
Before it is ready to pin onto the carseat cover you will want to open it up and fold under the end, then fold it back in half.
5. Take the bias strip you have just made and pin it all around the edge of the opening. You will want to make sure that you have tucked the actual opening piece inside the bias strip all the way to the fold-meaning you don't want it to be just barely over the edge. Pin this in place (lots of pins).
6. Now sew along the edge of the bias strip. Don't sew right on the edge, come in about an 1/8" because there is a good chance the under side of the bias strip doesn't match up perfectly with the top side.
7. Repeat all steps with the second strip of fabric (turn it into a bias strip and then pin and sew).
8. Press flat.
9. Now add buttons and elastic loop fasteners (see original tutorial). I made this one out of a cute blanket so I didn't think it needed any other embellishments but if it was plain I might add a cute teddy bear or puppy dog on the front as well. A first initial would be super cute too if you were making this for a specific child.
Here is a second one I made. This time I used the reverse side fabric to make the bias strips and I really like how it looks.
Happy sewing!!


I like the bias tape too!
ReplyDeleteThese turned out good! Love the last little green polka dot one.
ReplyDelete