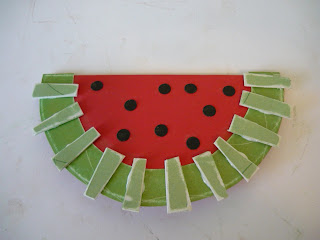
 I saw this idea in a Paper Crafts magazine years ago. I made a bunch of these cards then but haven't in a few years. Last night I was feeling card deprived so I just whipped one up. I love it. Of course living in a watermelon town, everything melon is cute around here. I thought I would share a quick and easy tutorial for everyone.
 Start with red cardstock (could be pink too). Find a round form that you can trace to create your melon shape. I used a pot I had in my craft room. Fold paper in half so that you will have a big enough space and trace your half circle.
  When it is cut out it will look like this. Sorry this is blurry.
 Next trace your half circle onto green cardstock. I didn't line up my top edges on purpose because I like to have the green be slightly larger than my red part. Cut out on the line you draw. Then cut again this time inside the line about 3/4 of an inch to make a rind shape piece.
 Like this. Glue this onto your red piece.
 It should look like this.
 Next I took a lighter shade of green cardstock and cut out a strip about an inch wide and glued it onto a piece of matt board (you could use cardboard too). This will give it some dimension. From this strip cut off random pieces (size and shape don't matter. Melons aren't perfect).
 This is what you should have. I don't cut a specific amount. I just cut a bunch and then use what I need.
 Before assembling I use an emery board to distress the edges of the melon rind and my little chips that I cut. I know there are specific tools for this but in these tough economic times an emery board works just as well.


That card is so cute!! Love it!!
ReplyDeleteSuch a cute card, perfect for summer!
ReplyDeleteThis is darling! I linked to it at somedaycrafts.blogspot.com
ReplyDeleteThanks for sharing this, it's so cute! I'll be linking.
ReplyDeleteWhat a cute card. This would be great for a summer birthday!
ReplyDeletevery cute IDEA!
ReplyDelete