Lets get started.
For this card you will need:
1-4 1/4 x 6" blank white card
1 piece of scrap yellow cardstock
1 piece of scrap cardstock in a coordinating color.
Stickers to spell "THANKS"
1. Start by cutting out your sun piece. I traced around a CD to get my pattern. Cut this out.
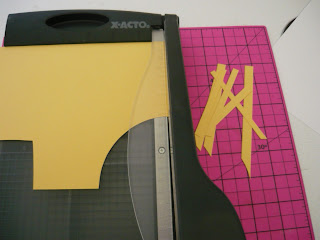
2. To cut the sun rays I used my paper trimmer and cut random pieces of yellow cardstock. I didn't want all my pieces to be uniform. Repeat with the coordinating color of cardstock as well.
3. Now attach your rays to the back of your card. I did this by first applying some double stick tape to the edge of the sun then alternating the yellow and colored cardstock pieces.
4. Now trim the center sun rays down (you can vary the size as you want).
5. Next I chalked the all the yellow edges. This is totally optional and I know chalking may be a thing of the past but I still like the look.
6. Now apply some tape or glue to the whole back side of the sun and attach it to your card.
7. Trim all the rays that stick out over the side. Trim down any other pieces that seem out of proportion.
8. Now to finish the inside I cut a piece of my coordinating cardstock slightly smaller than the inside of the card and attached it. Then I printed my sentiment on a scrap piece of the same yellow cardstock. I chalked the edge and then mounted it on a slightly larger piece of white cardstock. Attach this to the inside.
9. Lastly add the stickers to the front and you are done. 


Super cute--that might even be one I can handle :)
ReplyDeleteThinking about doing a Pass On The Thanks Challenge on my blog encouraging people to send out 3 thank you cards to those who make their lives better and encouraging them to do the same...would love to link up your posts from this week to give people some easy ideas for making their own cards:) Would that be okay with you?
ReplyDelete