Jun 24, 2011

Get Well Week Day 4-Get Well Cards

Today I thought I would share a couple of cute and easy ideas for Get Well cards.
1. Get Well (Inside: SOON).  This would be fun to send from the gang at the office or all the teachers at the school.  Everyone can write a little message on one of the strips of paper.

 2. Ouch (those are real bandaids)
 Inside:
 3. Got Sneezes?
 Inside:
See I told you that was going to be quick and easy.
Pin It!
Print Friendly and PDF

Jun 23, 2011

Happy Birthday to Me and Check out my Guest Post

I am not here today.  I am having a blast on my birthday guest posting at Just Lu in her Mommy MacGyver Series.  Go and check it out.
Pin It!
Print Friendly and PDF

Product Review-Sew Stylish Boutique

Rose and Heather from Sew Stylish Boutique e-mailed me asking if they could send me one of their unique headbands for free to try and review on my blog.  HELLO-if anyone wants to send me anything for free I will take it.  Rose and Heather have a big selection of unique and glamorous accessories in their etsy shop as well as a blog with lots of fun and stylish ideas.  Check out their etsy shop sewstylishboutique and their blog sewstylishboutique to see their stuff.
This is what came in the mail for me. (Ya I know these aren't my kids-mine would have nothing put on their heads so I borrowed my neighbors kids).

The headband is totally unique.  It is made with wire that wraps around your head (see their etsy shop for all the details).  I have not seen anything else like it.  The only thing that was a bit of a problem was that the ends of the wire got caught in the girls hair and tangled as you tried to take it off.  I think that it would probably be really great for babies (because it is very light weight and most of them don't have tons of hair to tangle) and for older kids and adults because they can manage it better and can get it off their own head.  I really like the light weight nature of it and that the headband part is practically invisible.  I am not a fan of big headbands.
Go check out their stuff.  They have what you need to glamor up your girls.
Pin It!
Print Friendly and PDF

Jun 22, 2011

Blogger-you are getting on my last nerve

I got an e-mail from a reader who said she was sorry she couldn't comment but my blog wouldn't let her (totally sweet-thank you thank you).  I am going to assume that that is the exact reason why all my hardwork over the last two weeks has totally 3 comments.
The thing is I can't even comment on my own blog.  Does anyone else have this problem? (not that you could answer me since you can't comment).  I have temporarily changed my comment format to see if that helps.  Sorry if that is an inconvenience for anyone.  I just want my comments back. 
Blogger-don't mess with me!!
Pin It!
Print Friendly and PDF

Get Well Week Day 3- Paper Milk Carton Caddy


I saw this on a blog Inking Idaho.  She has a template that can be purchased to make this super cute gift but I knew I could come up with a way to make something very similar but free.  This is what I did.
For this project you will need:
1 5x5 packing box.  I am not sure how they are measured but the actual size of the box when it is folded up is 5x5 (this is the exact size to fit the milk cartons from the pattern.  If you use something larger you will have to adjust all your other measurements).
4 copies of the milk carton template (I printed mine directly onto the wrong side of my cardstock to eliminate tracing and extra cutting.  NOTE: when I printed the pattern the extra little flap at the end that will hold the whole thing together did not print.  I cut one as I was cutting out my pattern.)
1 extra piece of cardboard 5x8 1/2"
1 extra piece of cardboard 5x2 1/2"
Paper and embellishments to decorate

First I printed the template onto my cardstock (in two different colors).  I cut out the pattern, scored and scored all the lines.  I assembled the cartons.

Next I disassembled the box so that it could lay flat.  I cut up from one end 4 1/2 ".  The other side will be bigger.  It can be cut down to size also to make another crate.
This is my cut piece.  I reassembled it into a box and taped the bottom closed and added some additional tape in the inside to hold down the middle.
Next I cut out my additional cardboard pieces.  I cut these from a slightly lighter weight box.
To assemble the carrier portion of the crate I folded the end of the long piece (2 1/2" wide).  I took my second piece which is also 2 1/2" wide and tape it to the bottom of the longer piece (in the opposite direction) so that is stands up like so:
When you put it in the bottom it will look something like this: (NOTE: you may need to trim it slightly to fit tight in the middle)
Before you glue it down take it out and cut out a carrying handle.  I cut a plain rectangle that I drew free hand but an oval would look cute or any shape really.  Once you have that cut you can glue the carrying handle down to the box.  I actually didn't glue mine down at all-the spray paint helped it hold but for more durability I would glue.
I then spray painted the whole thing white.  The color is totally up to you.  It needed multiple coats.  If you have a spray primer that would be helpful.
Lastly it is time to decorate.  I am leaving that part up to you.  Here is what I did:
(Everything is cardstock).  My big tag says: Friendship and Candy-just what the doctor ordered. 
The little tags say: Energy boost, pain reduce, strength to endure, candy cure.
I filled all the cartons with peanut M&M's (they totally have medicinal properties).


Pin It!
Print Friendly and PDF

Jun 21, 2011

Get Well Week Day 2-Dinner is on me cards.

While talking to a friend once who had just had a baby and was home recovering I was given a great bit of insight as she said, "Heather-I am so sick of lasagna."  We laughed but then I thought, "I know she has a point.  I would be sick of lasagna too if I had someone bringing one to my door every other day as a way of 'helping' me recover."  I decided I would try and be a bit more creative from now on in my dinner taking ideas.  Here is one way (in two different versions) to switch it up from the same old casserole or lasagna.


 It is a card with a gift card to a restaurant inside.  This way the family or person can get what they want, order take out, go out to eat for a change of scene or save it to use when they are feeling better.
To make this card you will need:
A piece of cardstock 5x10"
Fabric scraps for the apron
A piece of lace 12" long
A piece of ribbon 9" long
1 small piece of cardboard
2 small pieces of cardstock 4x5"
Pattern (found here)
I will show you how to make the apron and the gift card holder-the assembly is pretty straight forward after that.
For the apron:
 Cut out the apron piece, the two pieces of ribbon and the pocket piece (sorry pocket piece is not shown in the picture).
 Sew the lace around the outside edge of the apron (make tucks as you go so that the lace will lay flat).  If you don't have a sewing machine you could attach this with hot glue as well.
 Sew the ribbon piece along the top of the apron.
 Add the pocket piece and sew around the edge.
 Cut the spoon out of cardboard, attach a glue dot to the bottom and tuck in the pocket.
 Criss cross the ribbon ends as if you were going to tie it and put a glue dot in between to hold them together.  I attached the apron to the card with glue dots.
 To make the gift card holder I cut out two pieces (using the pattern) but only notched one of them. 
 I sewed around the three unnoctched sides.  I tucked my gift card inside and attached it to the card with double sided tape.

 A second idea for a gift card is using a mini folder template.
To make the gift card holder I cut a notch out of one end of the folder, then I sewed around the 3 unnotched sides.  I attached this to the card with double stick tape.
Two cute ways to help someone who is under the weather with dinner.
Pin It!
Print Friendly and PDF

Get Well Week Day 2-Welcome Home Muffins

 I found this super cute paper pattern to make this little house.  I thought it would be perfect to add to the top of a plate of muffins or cupcakes or brownies to welcome home a friend or neighbor who has been in the hospital sick.  You can find the pattern for the house here.
Pin It!
Print Friendly and PDF

Jun 20, 2011

Get Well Week Day 1: Paper Dolls

If you are looking for this week's Make Ahead Monday it will actually be posting on Thursday over at
Just Lu in her Housewife MacGyver series.  Be sure to check it out!!

As for today and the rest of this week I will be sharing a few "Get Well" ideas.  This series is in dedication to my friend Allisha (you know-the crafty mom who joins me on my card making weeks) who has finally got to come home after a horrific birth story and 26 days in the hospital (most of which were spent in the ICU).  I am glad to have her back home and as my neighbor again though I know she will still be recovering for a long time.  (P.S. if you want to read her story check out her husbands blog).

The week is going to be full of a bunch of different ideas for different "Get Well" situations.

The first idea is cute for a boy of a girl.  This just happens to be a "girl" version.  It is a make your own paper dolls kit. 
 You can find the instructions on how to make the book here.  In the first pocket I added fun foam doll bodies (I found these at Michaels Crafts).
 The next pocket has clothes (the kit comes with cloths including shirts, skirts, pants, short and shoes).
 The third pocket has different colors and styles of hair.  All the pieces are stickers  (except the long hair) so these are super easy to assemble.  I would give this with a glue stick (for the long hair) and a marker to draw faces and decorate shirts.
 I think it would be fun for a kid that is home sick or in the hospital.  Something to pass the time and be creative with.  The kit also included magnet pieces so these could be stuck to a fridge.  I added a front page to the book so that a personal message and instructions for the kit could be included.
 The second idea is also a paper doll idea.  I also found these cardboard paper figurines at Michael's Crafts.  They had boy versions too.  The kit includes 4-5 paper doll bodies, several pieces of patterned paper (to make clothes), scissors, glue and a marker as well as a template for making clothes.
 I made my own template for the clothes by tracing the body onto a piece of cardstock and then turning it into a shirt shape and pants shape.  You could include a skirt pattern or dress pattern for girls, or a suit or shorts for a boy.  Lots of possibilities.  I put mine in a plastic sleeve or you could use a zip lock bag.  This would also be fun for a kid that is home sick or in the hospital.  You could even add enough paper dolls for them to create their whole soccer team, or dance group or family.
Pin It!
Print Friendly and PDF

Jun 17, 2011

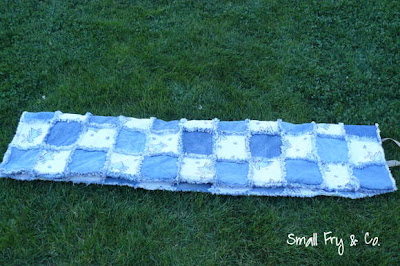
Beach/Picnic Blanket Makeover

You know how some blankets are soft and comfy, or sturdy and comfy and perfect for picnics and days at the beach except for all the grass and sand that stick to the back side of them?  Well this is an inexpensive and pretty easy solution to that problem.
You will need:
Your favorite picnic/beach blanket and
A fabric shower curtain liner (not the plastic kind-make sure it is fabric).  I got mine at Walmart for $9.00.  There are tons of super cute printed ones for more money-so if you are going to sew your own quilt then you could use one of those for the back or maybe you can find one that matches a quilt you already have made.
I spread the shower curtain out and then laid my blanket on top of it.
I cut the shower curtain down so that it was about 1 1/2" larger than the quilt.
Next I pinned around the outer edge of the blanket to hold the two pieces together.
I also pinned in a diagonal across the middle to form a large X through the quilt.  This is marking where I am going to sew to hold the backing in place.
Then I sewed to create an X through the quilt to hold the backing on (so that you don't slip around when you sit on the blanket).  Then I folded the shower curtain edges twice all the way around the quilt and pinned.  I sewed along each edge to catch the shower curtain backing.  (NOTE: I didn't measure or iron or any of the perfectionist type stuff so mine ended up with many folds-but it is for sitting on-so I am not too concerned...and I am not going to show you any of those pictures.  Just sayin, in case you are making one and it is not perfect either.  It happens).
Now here is my quilt top
and here is the back.
After adding the backing I decided I wanted to add carrying handles.  To do this I first folded my quilt as will be shown in the next photos.  Then I knew exactly where I wanted to attach my handles.

Start with quilt open, right side down.
Fold in half.
Fold in half again.
Now fold in half width wise.
And one more time.  See where you would put the handles).  I cut 2 15" pieces of this stuff (I am sorry but I can't for the life of me think of what it's name is right now).
Now your quilt is super handy to carry.  I love this so much I am going to add handles to all my outdoor quilts.
Pin It!
Print Friendly and PDF
Related Posts Plugin for WordPress, Blogger...