

As promised here is a tutorial to make a basic gingerbread house out of cardboard. There really is no right or wrong way to make one. You can have it be whatever size or shape you want. This is just your basic 4 walls and roof house. The house I made for this tutorial is different from the first to give you a few ideas of what you can do to change the size and decorations. The sky is really the limit on these. If I had more time in my life I would make one for each of my girls too and let them decorate their own. That will have to wait until next year.

So to make the gingerbread house you can print out and cut the pattern that I linked to at the bottom of this post or you can create your own. I just pulled some measurements out of the air to create this so there really is no right or wrong.

Next you will need to cut a door on one of the long side walls. I cut up about 2 inches and over an inch and a half. Lightly score the other side with your razor blade and fold the door back.


Now begin assembling the house. Attach the front and back to the sides with hot glue. Hold in place each time to make sure it is firmly attached.

Add on the roof also with hot glue. Don't worry if the roof doesn't match up evenly at the top-you will be covering that with "snow" in the end. Also if the roof pieces don't fully meet the front and back walls it is also okay because your roof decorations will cover that.

Now assemble the chimney. Each piece fits inside the other-well it is hard to explain what I mean-take a close look at the picture.

To attach the chimney start by first drawing a square (the size of the chimney) where you want it to go. This will be too small for the chimney to fit in at this point but it gives you a guide for cutting the hole.

Cut out that square. Then rest the chimney on it like in the picture. I then get a visual of how much more I want to cut in order for the chimney to fit.

In the end you will have to cut out a rectangular piece. I suggest cutting it larger gradually and trying to fit the chimney after each time rather than cutting too big and not being able to fix it.

Cut the chimney down so that it is not so long, dab hot glue around the opening in the roof and attach the chimney.


Now comes the fun part: decorating. Here are some of the supplies I used:
glitter fun foam sticker sheets
puffy fabric paint
white window caulking
I also used white glitter on top of the snow to make it shimmer

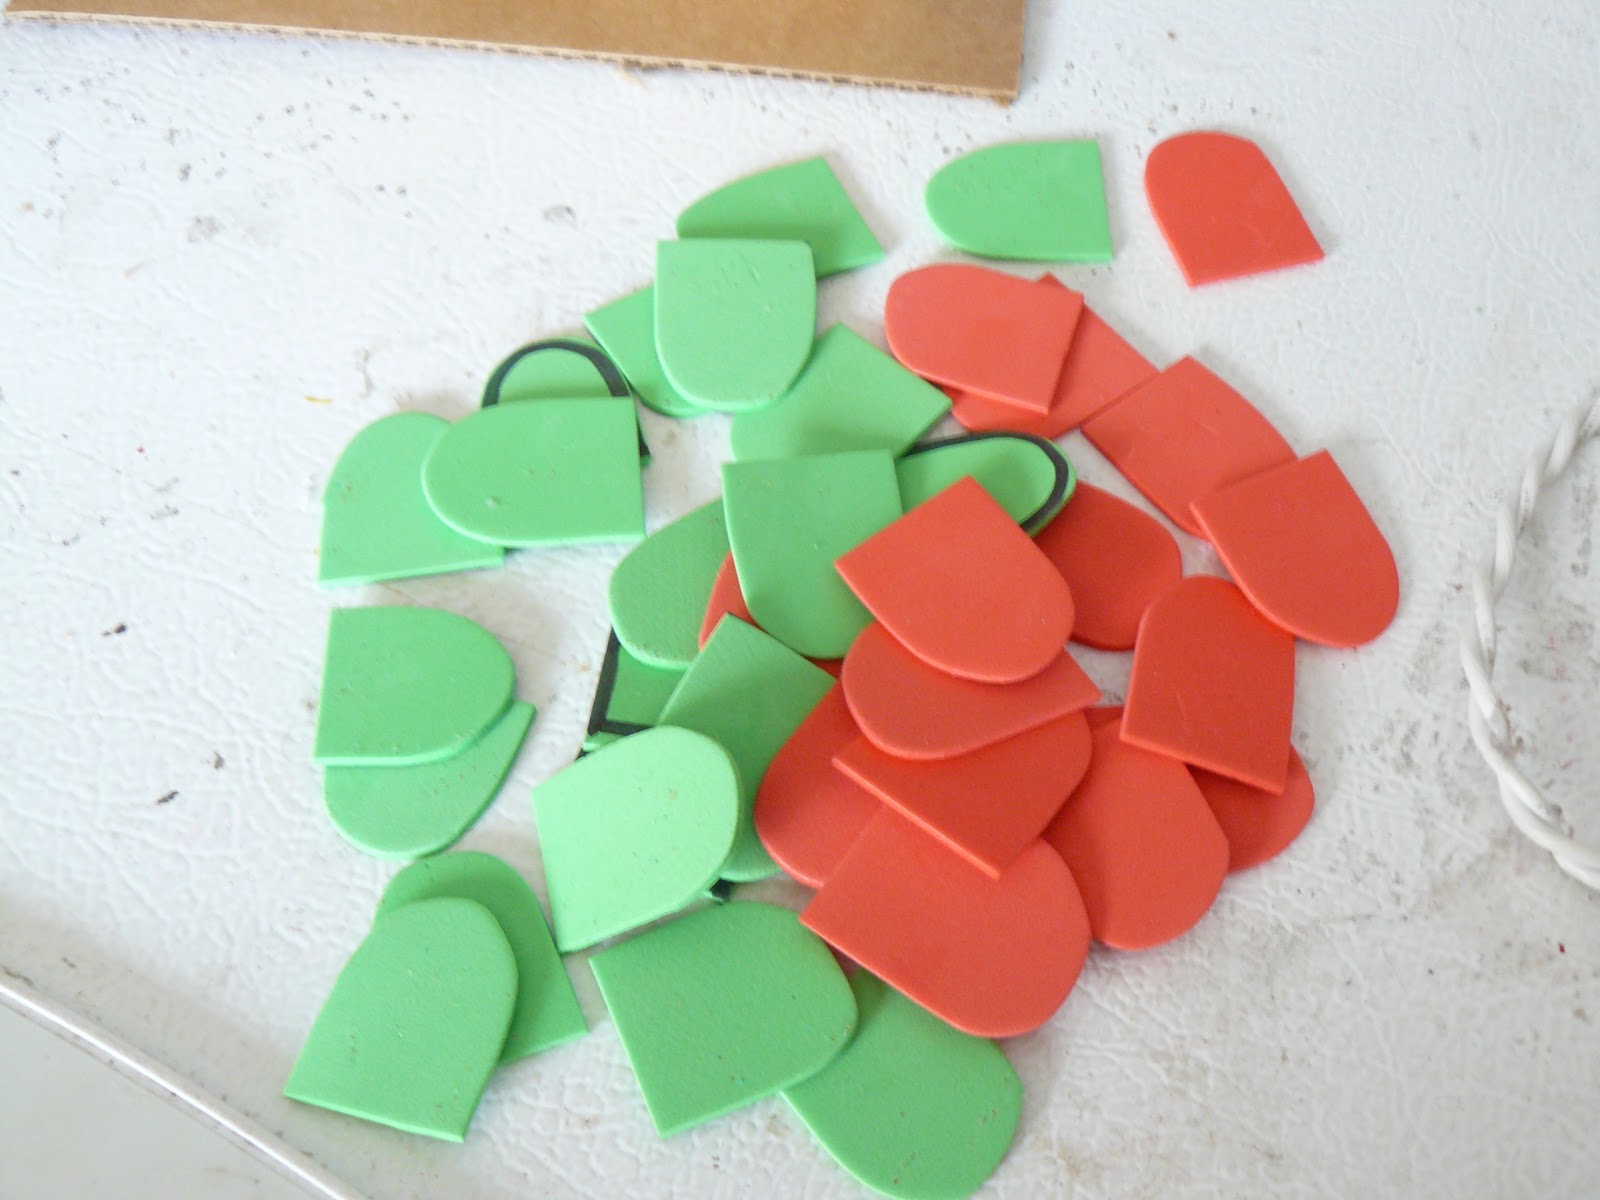
To make the roof tiles (this is so non precise it is almost a joke) draw a shape something like this on your fun foam pieces. I didn't make any of them the same size. These are bigger than a quarter is round just for a basic size reference.

I cut red and green
Begin by gluing a row to the bottom of the roof (if you will notice I actually started by gluing them to the top and then realized I made a big boo boo and fixed it). Before you actually glue you will want to play around with how many roof tiles you will need in a row to cover the roof. You may have to overlap them some.

Continue gluing up the roof. If you used the sticker sheets then you could just peel and stick all of these.

When you get to the chimney play around with the arrangement. I had my tiles come all the way up to the chimney on one side.

Then I cut my next tile so that it would fit around the chimney like so:

The remaining rows also went up to the chimney and on the other side I added a small piece that was rounded on the bottom and then the last tile, only I forgot to take a picture. You will figure it out-you are smart.

Now you will want to add the snow as it takes a while to dry. I used the white caulking for this. I bought the tube kind that you can squeeze with your hand only my hands either have zero strength in them or that stuff is next to impossible to get out. What I did was actually cut the tube open and spread the caulking on with a knife and pushed it down with my fingers. It washes right off both your skin and a knife so treat it kind of like frosting. It is strong smelling so consider yourself warned. When you have the snow just how you want sprinkle it with glitter and then let it dry.
.jpg)
And while you are going to let that dry it would also be a good time to let the puffy paint details dry too. I used the white puffy paint kind of like I would frosting on a real gingerbread house to make decorations. I just did swirly lines on each side of the house. I am sure there are hundreds of people out there that could come up with something more creative.
.jpg)
Once everything is dry you can add your final candy details. For this house I made candy canes (cut from red fun foam with white puffy paint stripes), gumdrops, dots (cut with a hole punch) and a wreath for the door. The first house I did I also made mint candies. There are endless candy possibilities. I have never actually made an edible gingerbread house so I am not too familiar with all the things you might put on one. I kept thinking I wanted to add something else to this one but I couldn't ever figure out what more I would add so I left it just as it was.


As a final detail I did add some puffy paint dots to the peak of the roof.

Really very easy. The hardest part is cutting all the cardboard. After that the assembly is just plain fun. And unlike a real gingerbread house you don't have to worry about it falling apart or have to throw it away after all your hard work. Wouldn't a little gingerbread village be cute or mini houses or one with a big tower on the side? Happy "gingerbread" house making..and it is okay to say that they look too cute to eat this time.


A fun idea for kids! But they won't get to eat the candy off this one. I remember doing graham cracker houses with 2 little boys (about 5 and 7), and we decorated the houses with all kinds of candy. After a couple of days we noticed one of the houses hardly had any decorations on it. The 5 year old was steadily removing and eating the decor on his house!
ReplyDelete