Today you get a double whamy of cupcake cards. The first is by my friend Allisha. It is cute mini cupcake card.
1. To make this card start by cutting your card piece 4 1/4 x 5". Cut a piece of patterned paper 2 x 4 1/4" and adhere it to the top half of the card.
2. Next cut the border piece. Allisha used die cut border that she made using her Cuttlebug. You could use a piece of ribbon or coordinating paper too. If using something intricate like this border-Allisha recommends running it through the Xyron Sticker maker for easy attaching.
3. Cut a piece of cardstock (the same as the background) 2 3/4 x 3 1/2". Stamp sentiment on bottom right hand corner and ink edges.
4. Die Cut Sizzix Cupcake and cherry (if you don't have a die cut you could find a pattern for a cupcake by searching online for cupcake clipart). Add mini brads for sprinkles. Assemble on center piece of cardstock. Add 3 brads to bottom lefthand corner and ink card edges.
And here is the darling girl version:
Totally cute right!!!
The second card is this Jumbo Cupcake card.
The actual card is mini and hidden on the back.
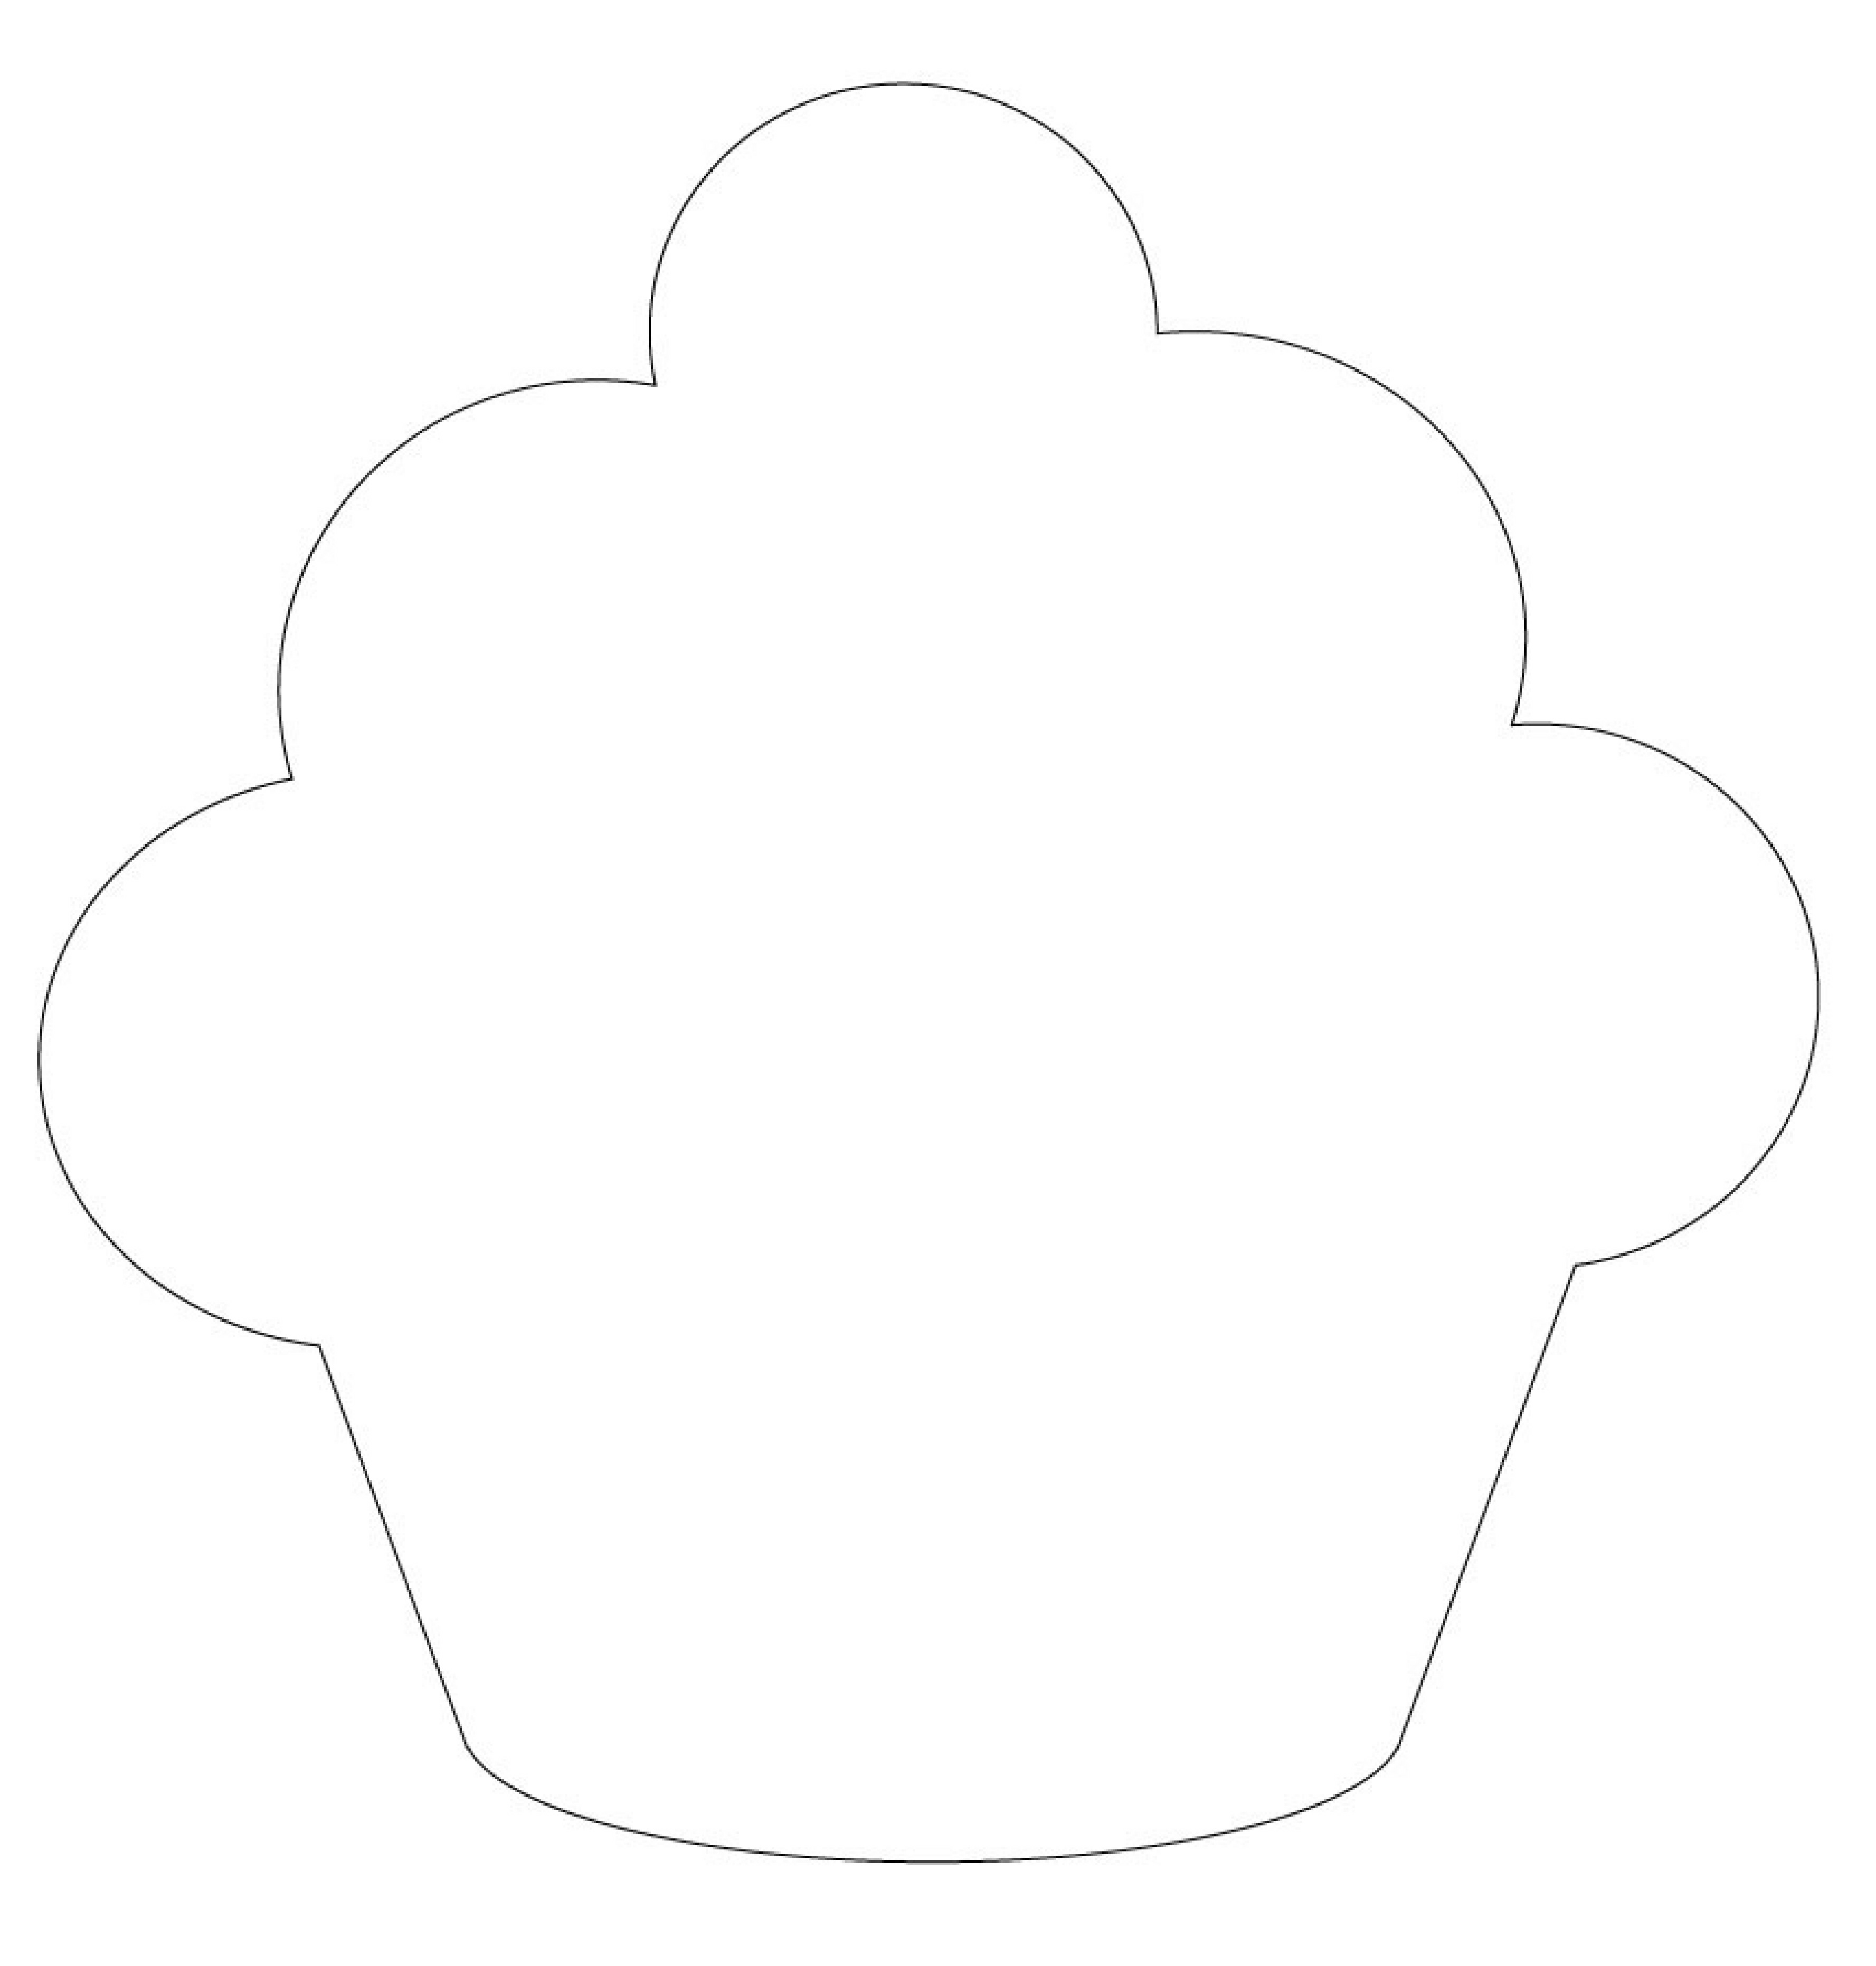
Cupcake Pattern
1. Start by downloading the pattern and cutting it out. Place the top part of the cupcake onto brown (for a chocolate cupcake or white for a vanilla cupcake) cardstock. Trace the top of the cupcake and then round the bottom...
like this. Cut this out.
2. Choose your cardstock for the cupcake wrapper. Accordion fold a piece larger than what you will need for the bottom of the cupcake. My accordion folds were about a 1/4".
3. Slightly unfold and trace the bottom of the cupcake pattern onto the wrong side of the wrapper paper.
Like this:
4. Cut it out. It will look like this.
5. To make the top look authentic, I cut diagonal cuts all along the top.
6. Attach the wrapper piece to your cupcake top. Because you want the folds to stand out use a large glue dot or a piece of mounting foam tape to attach these two pieces and you will still get the 3-dimensional look.
7. Make your card piece (finished size 2 1/2 x 3").
8. Stamp or write sentiment inside.
9. Attach to the back of the cupcake with double sided tape.
10. Tie a ribbon around the front of the card. If you want you can add a little tag as an embellishment to the front.
Done!! Happy Crafting.


So stinking cute! I've got to make these too. I need a card making day, soon!
ReplyDeletehave enjoyed the cards - now to just take the time to do them!!!
ReplyDelete