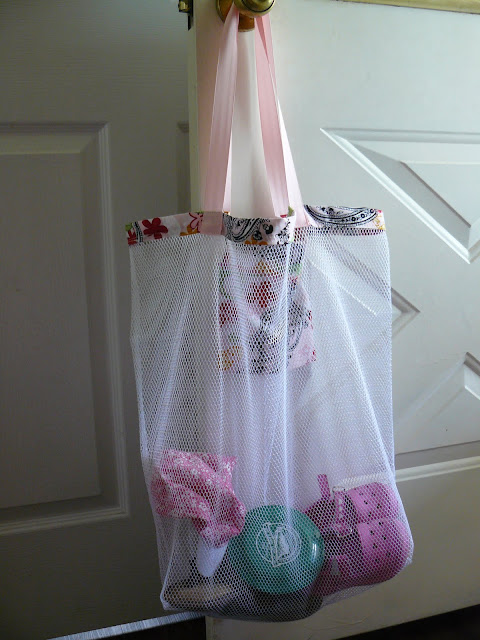
I have recently been in a creative slump and was praying for some new ideas. I decided one afternoon to hit the hardware store in hopes that something would pop out at me (listen when you are in a town with 2 stores-one of them being the hardware store you don't have many options for inspiration). However on this day Heavenly Father was smiling on me because I found inspiration for my beach week beginning with this mesh camping bag.
To turn this into a cute and usable beach bag you will need:
2 pieces of ribbon 26" each
1 piece of fabric (for the top edge) 2 1/2"x45"
1 piece of fabric 15 1/2"x 6 1/2" (for the pocket)
1 -7 " zipper.
1. To begin, open up the mesh bag, lay flat, and cut 1 " off the top (this is on the drawstring end). 2. Turn the bag inside out. Next pull out the corners on the bottom to form a point (you kind of flatten it).
3. Mark a line 3" up from the point (it is in blue but very light in this picture).
4. Sew along the line (this is going to square off the bottom of your bag).
5. With the bag still inside out, flatten the corner points onto the bottom center seam and pin.
6. Sew along each one from the edge to the point.
7. Next take the 45" piece of fabric and
fold in 1/4" on each side (lengthwise).
And then press the piece in half lengthwise.
8. Turn the bag right side out and sandwich the top of the bag in between the fabric piece. Pin in place but don't sew it yet.
9. Now you will create the pocket. First press a 1/4" down on each of the short sides of the pocket fabric.
10. Now pin each side (the ones you just pressed down) to the zipper. I pin so that the fabric just barely touches in the center of the zipper.
11. Unzip the zipper part way and sew along the edge of the fabric. When you get to the zipper pull put the needle down in the fabric, lift the presser foot and slide the zipper pull back under the presser foot and then continue sewing. Repeat on the opposite side.12. Now turn the fabric piece inside out and pin the edges. You will want to arrange the pocket piece so that the zipper is about 1 and 1/2 inches down from one edge (just like the picture).
13. Sew along each side. NOTE: before you sew the second side, open the zipper part way or it will be really tricky to open it after you have sewn the side closed. I speak from experience.
14. Pink the edges (this will make it so that you don't have to finish the inside of the pocket).
15. Turn the pocket right side out and press flat.
16. On one side of the bag, slip the pocket piece under the top edge fabric (on the inside of the bag-with the zipper facing out) and pin in place.
It should look like this.
17. Now sew around the fabric edge with 2 rows of stitching.
18. Last attach the ribbon handles on top of the fabric. Fold under about a 1/4" twice on each end of the ribbon. Then measure in from each side 4 1/2". Pin the ribbons in place and sew around the bottom of each in a square. Repeat with the second ribbon.
Now your bag is ready to fill with all the essentials like flip flops, hats, swimsuits and more. The only thing that this bag won't fill with is sand (it will shake right out) and wet stuff can dry easily. Perfect for the summer!!
Enjoy!!!


my grand daughter is going to Girl Scout Camp for the first time this summer... that bag would be great for her soap, toothbrush, towel etc. AND it wouldn't be like everyone else's
ReplyDeleteGreat idea! I love it.
ReplyDeleteI can imagine leaving the drawstring on and putting the fabric so and pocket below it so our had a way of closing without adding anything to it. It might even be less work. I love it anyway. Thanks!
ReplyDeleteFAB IDEA for a MESH BEACH BAG! Done in 18 EASY steps -- simple enough to sew. Really practical for going to the beach, camping, actually any time! I LOVE the paisley colorful print trim & the zipped inside pocket. Could make a larger pocket with a couple zipped portions on other side. THANKS FOR SHARING. Sarah Helene in Minneapolis
ReplyDelete