Jan 31, 2013

DIY Little Guy Chunky Tie

There are a lot of little boy tie tutorials out there and they all have really cute results...but do they have a model as cute as mine?
Well these ties are not only adorable but they are really easy to make.
You will need:
1 mens size neck tie (tied-I had my hubby do this)
1 piece of elastic 7 inches long
1 alligator clip
Begin with a tied necktie.
Measure down 8 1/2" from the knot and cut straight across
Also cut off the part that goes around the neck leaving 4 inches on each side.
Now open up the tie to expose the inside lining and cut off about 2 inches.  This makes it easier to fold.

Serge or zig zag stitch the bottom.
With the tie facing front side down fold back the bottom of the tie (where you just cut and sewed it) to fold a point.  Pin it in place.

Flip it over to make sure that the point is centered and the sides look even.
Before sewing it in place make sure that the narrow end of the tie is not longer than the wide part.  In my picture you see that the narrow end is longer than the wider part.
I trimmed off 1 inch and serged the end.  If it was shorter than I would have just left it as it was.
Now using a needle and thread hand sew the folds down (being careful not to let your stitches show through on the front).
Then bring your needle up from the back side of the narrow piece.
Make a few stitches in place to hold this piece down.
Now we are going to finish the neck part.  This is probably the hardest part of the whole thing.  Start by exposing the inner lining once again and cut off 1 inch.  Then fold in the ends of the cut neck pieces and pin.  I found it tricky to get everything to stay in place but finally got it.

Stick your piece of elastic in the opening of this end, pin again and stitch straight across catching the elastic).
Fold the other end around the alligator clip and stitch.  Now repeat the process of exposing the lining, folding in the ends, pinning and stitching on the other neck piece (only this time you will not sew in a piece of elastic).
And that is it.  Easy.  It is easy to put on, it doesn't pull off, it is not super stretchy so it doesn't flip back in your child's face and....
they make for fantastic baby entertainment during church or other functions.


The little guy chunky tie-the perfect accessory for your handsome little boy.


Pin It!
Print Friendly and PDF

Jan 29, 2013

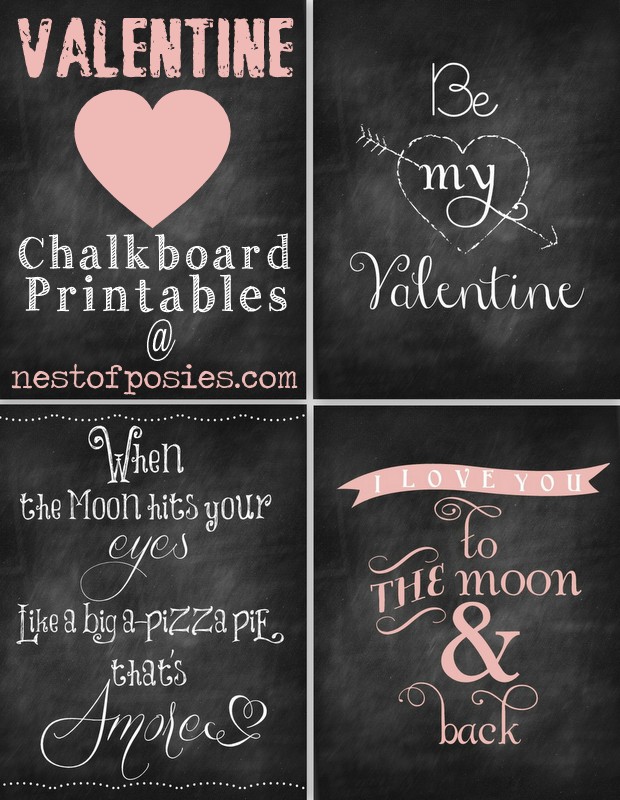
Some of My Favorite Free Valentines Day Printables

Don't you just love free stuff.  Even if I don't need it I want it just because it is free (is that a sign of being a hoarder???? YIKES).  Anyway Pinterest just adds to my "must have more free stuff" fetish.  But what I love about Pinterest is now I don't have to have it all at once.  I can find it, pin it and then come back to it at another time-you know spread out the free stuff love.  Well here are a few FREE Valentines Day printables that I just LOVE!!!!  Now you can print them out yourself and share them with someone that you love too.

Valentine #Chalkboard #Printables via Nest of Posies #Valentines


Kids Valentines Day Card Printables


boy valentines


Valentine Candy Bar Wrapper


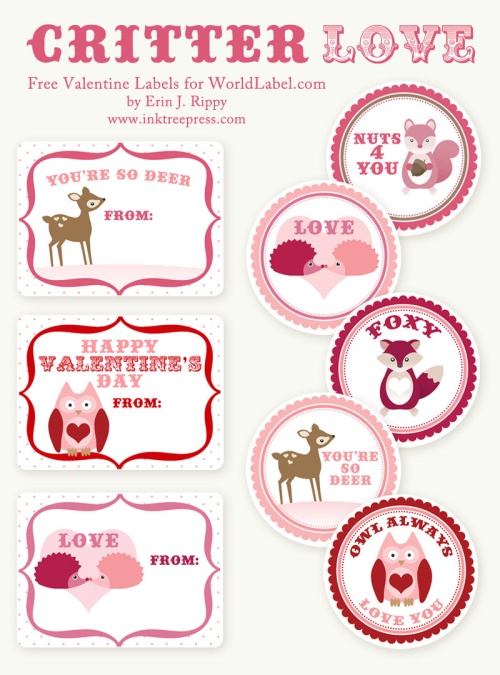
Critter Love

Critter Love Labels from World Label (scroll down to find it and check out all the other cute things along the way)


You are the ______ to my ______ cards from Kiki and Company (look for an upcoming project I have using these).

Want more Valentines ideas?  Check out my Facebook page for a mini roundup of my favorite Valentines ideas for kids.


Pin It!
Print Friendly and PDF

Jan 28, 2013

Make Monday: Lime Chicken Quesadillas


During my years as a Family and Consumer Sciences teacher I created a yummy recipe for lime chicken taco salads that were a big hit with my students.  This recipe is inspired by those yummy salads which have been on my mind lately.  I love to cook but I have to say that I HATE making lunch.  Seems like I just finished making breakfast and I have been planning what to make for dinner and then lunch time arrives and I can't think of a thing to make.  My kids would be happy with mac and cheese and chicken nuggets every day but I would feel like the worlds worst mom for feeding them that everyday so I have to throw something else in at least a few times a week.  Luckily for me they love quesadillas.  

So here is my easy lime chicken and pinto bean quesadilla recipe:

1 can chunk chicken (I use the small can but if you are making lots of these you could use a larger can)
lime juice (1-2 tbsp)
1/4 tsp red pepper flakes
1/4 tsp garlic salt
salt and pepper to taste (but use more pepper than salt)
pinto beans
grated cheese
additional toppings as desired


Start by emptying the can of chicken into a bowl and mixing in the lime juice, red pepper flakes, garlic salt and then salt and pepper and let that marinate for a minute.  If you don't want the spice omit the red pepper flakes.  If you want more of a lime flavor-add more lime juice.
Then simply assemble.  I spread my beans, add on the chicken, cover with cheese, sprinkle on some chopped green onions (those were an after thought so I didn't get them in the picture) and a few dollops of guacamole.


Then fold it in half and place on a hot grill sprayed with cooking spray.  Spray the top side of the quesadilla too with cooking spray.  When golden brown, flip it over and cook it on the other side.

Remove from heat and cool for just a couple of minutes then slice.  Super yummy flavor and it only takes about 5 minutes to prepare.  Now that is my kind of lunch.


Pin It!
Print Friendly and PDF

Jan 24, 2013

Snack Time Clock


Do you hear the words, "Can I have a snack?" all day long like I do?  Seems like every time I turn around I have a child under my feet asking for a snack and my youngest little pumpkin in particular can eat a meal and then be asking for a snack 1/2 an hour later.  Drives me BANANAS!!! So I created the snack time clock and it has become the authority on snack time in our house.  It is incredibly easy to make one-though I am sure you could craft it up as much as you want.  I needed something that was visual since my kids are too young to tell time or read.  So I bought a basic face clock at Walmart for $3.95


I flipped it over and unscrewed the tiny screws on the back.

Now you can flip it back over and take off the outer ring and glass.

I painted the hour hand yellow (any bright color will work)
Then I colored my snack time sections with yellow marker and added food stickers (the fruits and veggies stickers are to trick all you readers into believing that I only feed my children those things for snacks).

Let the paint dry, replace the glass and outer ring, and screw the screws back in.  And there you have it.  Now when my kids ask for a snack I refer them to the clock.  If the yellow hand is pointing to a yellow section then they can have a snack.  If not then they have to wait (though there are sometimes exceptions).  And in case anyone is questioning my snack time hours let me explain.  We usually eat breakfast at 8:30 or 9:00 and lunch at 1:30 so an 11:00am snack time is right in between those times.  Having the whole section colored doesn't mean they can eat for an entire hour either.  The 3:00 snack time works too because we usually eat at 6:00 for dinner.  Of course you would make it work for your family.  Perhaps more snack times if you have small children or health issues.  It is just a great visual for your kids and eliminates the constant whining for snacks.  The clock now becomes the one to blame if you don't hand out food.  A quick and easy fix for something that drives every mom crazy.
Pin It!
Print Friendly and PDF

Jan 22, 2013

Valentines Coupon Books for Kids from Mom


Look what I got for Christmas:
It's a package of 500 small paper bags( 8 1/8 " x 4 1/8") from Sam's Club.  It is just what I asked for.  I mean what more does a girl need than 500 paper bags and Pinterest-it's a match made in heaven.  So I decided that this year I am going to try and do 1 project using paper bags a month (at least , though I might be an overachiever).  So for this month I thought I would show you how to use paper bags to make a coupon book for your kids. There are always coupon books for kids to make for parents but how about one that you make for your kids.  
The one that I made has 6 coupons so you will need 6 bags.  I do have a link to the coupons however they are not rewritable (because I am not smart enough to figure that out-so if you know how please share that info) so if you are good with the coupons I came up with then please feel free to download and print them to use.  If you would like a set of blank coupons sent to you please send me an e-mail.
1. You will start by putting all 6 bags together and stitching through the bottom end  (eyelets, brads or staples would probably work too).
2. Don't stitch up any higher than a 1/4" because you need the full length of the bag to fit the coupons.
2. Now you will attach the bag flaps to each other.  If you fold back a bag you should see something like this:
Put a couple of pieces of double sided tape on the flap and tape it down to the next bag.  Repeat with all the bags.
Then place the bags with the flap side up.  This will become the top of your coupon book.
3. The next step is to decorate the front.  I cut a piece of cardstock the same width as the bags and large enough to cover the bottom flap of the paper bags.  I also cut a small embellishment piece that I punched with a scallop punch and also the cover.
4. Attach these with glue, glue dots or double sided tape.  I tied a bow with some embroidery floss over the top (but bakers twine would look excellent-I just don't have any of it).  I am not sure if I am still completely satisfied with the cover but I didn't have any more time to fret over this project, so I moved on.
5. If you want you can stitch over the end of the cover paper again if you want-just adds a little extra detail.
6. Print out the coupons on cardstock (or presentation paper which is what I have been using lately and I love it.  I got 2 big packs at the thrift store one day and I am so happy with it).
7. Cut around the coupons.
8. Attach little ribbons or other embellishments to the ends of the coupons to make them easy to pull out.


And there you have it.  A cute and easy Valentines Day coupon book for your kids.  Of course you could use the same idea for husbands or boyfriends, or even grandparents.  

Want to print the coupons yourself?  Go here and here for coupons and here for the cover.

Also shared here:

Pin It!
Print Friendly and PDF
Related Posts Plugin for WordPress, Blogger...