I came up with the idea for these cute Halloween tags when I was teaching scrapbook classes at Paper Daisy in Orem. They are a great way to use up all those little scraps of cardstock you are holding on to! To start, you will need 5 tags in these colors--two peach, one black, one green, and one orange. My tags are 3 in. x 1 1/2 in., but you could easily use any die cut tag you have.
Here is what you will need for all the tags. I did one picture instead of lots of pictures of tiny pieces. I'll tell what you need for each tag as I give instructions.Frankenstien:
Supplies: 1 green tag, one black tag, zig zag or grass craft scissors, one black eyelet, two mini black brads, one gray strip 1/4 in. x 2 in., some pink chalk, and glue.
Take the black tag and cut with the craft scissors just above half of the black tag. This piece becomes frank's hair. Adhere hair to the green tag, then add the eyelet to the hole. (The eyelet isn't absolutely necessary, but adds a more finished look.) Put your brads through the tag, creating eyes. Adhere the gray strip to the back of the tag, creating the bolts in his neck. Add some pink chalk to his cheeks and he is done!
Pumpkin:
Supplies: 1 orange tag, one orange eyelet, two mini black brads, 1 leaf punch, green cardstock, orange chalk
Take the Orange tag and add the eyelet. Chalk ridges into your pumpkin using a slightly darker chalk than the tag color. Punch a leaf out of the green cardstock and adhere to tag. Add mini brads for eyes.
Mummy:
Supplies: 1 peach tag, 2- 6 in. strips of gauze cut in half the long way (you should have 4 skinny pieces total), 1 white eyelet, 2 black mini brads, pink chalk
Take the peach tag and begin wrapping it with the gauze. I only used 3 of the four strips so it wasn't too bulky and some of the peach tag could show through the gauze. Make sure your tag is fully covered on the front side. Add your white eyelet. Add the mini brad eyes. Chalk his cheeks.
Witch:
Supplies: 1 peach tag, 1 black eyelet, 2 mini black brads, black cardstock, orange cardstock strip1/4 in. x 1 1/2 in., black cardstock strip 1/4 in. x 2 in., 6-2 in. pieces black baby ric rac
Take the peach tag and trace the top of the tag onto black cardstock making it come to a point. This will be your hat. Cut it out and adhere to peach tag. Add the eyelet to the top of her hat. Adhere the orange strip to create the band of the hat. Glue the ric rac to the edge of hat, then add the black strip to create the brim of the hat. Add the mini brads for her eyes. Chalk her cheeks.
Black Cat:
Supplies: 1 black tag, black eyelet, 2 mini black brads, purple cardstock cut into a small triangle, 3 strands of black DMC floss cut to 3 in. in length, mini hole punch or needle, white gel pen
Take the black tag and add the eyelet. Add the mini brads for eyes and glue purple triangle underneath for the nose. Draw a line down from the nose for a mouth using the gel pen. Using a mini hole punch or a needle, punch 3 holes on each side of the nose for whiskers. Thread the DMC floss through one side of the cheek, and out the other. Glue on the back to hold in place. Repeat for other 2 strands of floss.
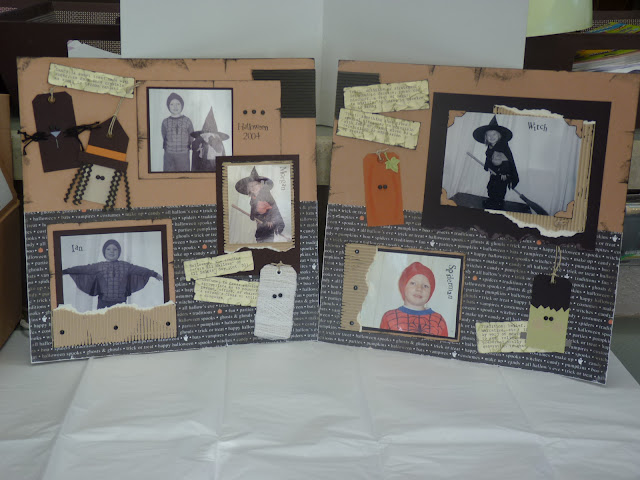
I used my tags as an embellishment on this halloween scrapbook page, but if you wanted to use them as gift tags, simply cut another tag out of the same background color and glue to the back of your halloween tag. This will finish it off, hiding the backs of your brads, glue, etc., and give you someplace to write! Add a ribbon through the eyelet at the top and you have a cute tag to add to a halloween treat!


love it!!! I´ll feature on my blog
ReplyDeletehope you don´t mind
hugs from Brazil
Lovely ideas!
ReplyDeleteThanks for sharing
I think these are so adorable! I am featuring them on my Halloween Favorites post. http://www.nestcandy.com/2011/10/halloween-favorites.html
ReplyDeleteJust stopping by to let you know that I have featured your project on Fun Family Crafts! You can see it here
ReplyDeletehttp://funfamilycrafts.com/halloween-tags/
If you have other kid friendly crafts, I'd love it if you would submit them :) If you would like to display a featured button on your site, you can grab one from the right side bar of your post above.