May 24, 2013

A Few "Other" Uses For A George Foreman Grill

Product Image
Do you have a George Foreman grill?  I know-seems like they are very "1990's" or something.  I think thrift store shelves are lined with them-not necessarily because they are bad but probably because people just didn't feel like it was something they used enough to warrent shelf space.  I have never been a fan myself basically for only one reason-my college roommate.  When I was in college I had a roommate that had one of these and she always left the little grease catching dish on the counter for days after she used it, filled with grease.  Drove me absolutely crazy and smelled bad too.  I swore I would never have one.  And then I got married....and I inherited not only my husbands but we also got one as a gift.  So I had to figure out a few ways to use it and guess what?  I actually LOVE my George Foreman grill and I found out that there are a few different ways to use it.  I know, random post, but I thought that in case anyone else has one of these and is not sure what to do with it now you will have a few more options.

1. Grilled chicken: I use my George Foreman grill to grill chicken for salads, pizza or tacos when firing up the BBQ would be silly to cook only 1 or 2 pieces of chicken.  It is much more convenient to just grill it on my counter.  I cut the chicken breast in half lengthwise to help it cook faster and more evenly and I always drizzle a tiny bit of oil on the chicken while cooking it because it helps to keep it from burning.  The taste is excellent and it is so easy (especially if you don't feel like you are barbecue inclined.)

2. The next best thing to a fire roasted hot dog:  A hot dog cooked over some form of flame is one of my favorite things.  I like them slightly burned on the outside.  Again, like with the chicken, when I am on my own with the kids I don't always feel like turning on the BBQ to cook 3 hot dogs and I certainly am not going to be lighting up a fire.  But did you know that a George Foreman grill can cook a hot dog to a very nice slightly blackened state that is delicious?  I put the hot dogs in the grill (3 at a time) and just rotate them every few minutes until they are cooked just the way I like them on the outside.  You can even do this with frozen hot dogs.  They cook so well.  This is one of my favorite way to use my grill.  No smoke, no smelly clothes and quick and easy clean up.

3. Pizza Panini's:  I don't have a panini pan and I have seen plenty recipes that call for one but I honestly don't have room for another appliance.  This week when I pinned a recipe for grilled pizza sandwiches I decided to try and grill it on my George Foreman grill and the result was EXCELLENT.  The grill worked perfectly.  The sandwich was toasted perfectly, crusty but not burned, the inside was melted and gooey with cheese and pizza sauce and I think I just found another new favorite and easy way to make pizza.  I followed this recipe from Our Best Bites except that I brushed the outside of mine with olive oil.

4. Grilled Cheese: Since the panini's worked so well on the grill I figured that a plain old grilled cheese sandwich would work good too.  The only thing you want to be sure of is that you use thick bread.  Brush the outside with olive oil or melted butter.  Olive oil results in a perfect crunch and has a very yummy taste.

My next idea: french toast.  I haven't tried it yet but I will let you know how it turns out.

So in case you thought this little "lean, mean, grilling machine" was only for burgers now you know that there is so much more you can do with it.  And if you don't have one and have the room in your house for another appliance pick one up at a thrift store just to have for these quick and easy ideas.  You won't be disappointed.  And I am not even getting paid to say that.

Pin It!
Print Friendly and PDF

May 23, 2013

Baby Boy Ideas Galore at Blue Cricket Design

Need boy ideas?  Blue Cricket Design has got you covered.  Since she just had her own sweet little man she is sharing all kinds of ideas for boys from clothes, to books, to things to make including my tutorial for a "lil stinker" onesie.  

Head on over to Blue Cricket Design and browse for a bit.  There are lots of cute ideas.
Pin It!
Print Friendly and PDF

May 21, 2013

Patriotic Pop Can Wreath


What could be more American than Soda Pop?  Last fall I saw a fall wreath made of leaves cut from pop cans.  Since then I have wanted to make a wreath using pop cans but I couldn't come up with the right color combination.  Then one morning on a walk I got an inspiration to make a patriotic wreath using red, white and blue-very popular pop can colors.  This is one of those projects that makes you grateful that you recycle because the cost is minimal and the supplies are usually plentiful.  
To begin you need to gather and cut your pop cans.  To do this I used a plain old steak knife.  I am not going to guarantee that this won't ruin said steak knife.  I happen to have a surplus of these so I didn't mind destroying one for this cause and as it turned out it didn't destroy it.  I just want to add that disclaimer so that no one gets upset if they ruin their good steak knives doing this.  
 Make your first cut around the top rim of the can-I do this just above where the can begins to angle up.  Just stick the point of the knife in and cut (WARNING: if you don't like the sound of nails on a chalkboard you may not like this either).
 Then repeat and cut off the other end.  Be careful because the can edges do become sharp.
 Lastly cut the remaining can piece with a pair of scissors.  You can flatten this piece by putting it under something heavy like a brick out on the cement, or stepping on it.
Next you will want to cut your stars.  I did this using die cuts at my husbands school.  I was able to cut 2 stars from each pop can piece though the star die was bigger than the pop can piece was wide so some of the tips got cut off.  An amazing thing happens when you cut the can with a die cut - the edges are not sharp. Now I know what some of you might be thinking, "I don't have any die cuts but I bet I could just cut those out with scissors."  That is what I would have thought if I didn't have access to die cuts but let me tell you it will take longer, be harder, be sharper and probably won't turn out as good so I highly recommend finding some die cuts to do this.  Many scrapbook places have access to them, and schools.  Your neighbor may even have their own die cut machine-I know mine does.  
I don't know exactly how many pop cans I used but it was quite a few-probably at least 2 grocery sacks full (of pop cans before they were cut down).
 I also thought that some little yellow stars shooting off of wire curls might look cut so I cut out some mini stars from some lemonade cans.
 Then using good old hot glue, stick the stars onto your wreath base.  I used a grapevine wreath.  I kind of liked a bit of a rustic look so I crinkled and bent each star before sticking it on.  WARNING: hot glue on an aluminum can piece is HOT!!!  Just overlap as you fill in the whole wreath base.
 Then I added the mini stars by gluing them first to wire curls I made by wrapping a piece of wire around a pencil.  Glue those randomly all over the wreath.
 Perfect and patriotic. Soda is American, pop cans are American, and recycling should be part of every Americans life, so I love all the things this represents.
What a fun way to brighten up your front door this summer.  I bet if you look around your garage long enough you will find pretty much all the supplies you will need.  And it is a good reason to enjoy a cold soda on a hot day this summer.  
God bless America.

Also shared here:

Pin It!
Print Friendly and PDF

May 20, 2013

Make Ahead Monday: Strawberry & Cream Cheese Filled French Toast Rolls

It's a long name but what it really stands for is: DELICIOUS.  These are almost too yummy to categorize as a breakfast item but I am okay with making that stretch.  I got the recipe/idea from Cinnamon Spice and Everything Nice.  She makes her's with peanut butter and jelly.  We are not PB&J fans at my house so I came up with an alternative filling and it is EXCELLENT-strawberry cream cheese.  
I am going to let you go to the original source for the recipe and instructions but I just wanted to share how I made the filling.  
I used whipped cream cheese spread.  Have you tried this?  This was my first time and I am hooked.  I always seem to have a rough time getting my cream cheese smooth and creamy but this is already as smooth and creamy as one could want.  
I mixed half a container of whipped cream cheese with 1 tbsp of sugar.
Then I added about a 1/4 cup of homemade strawberry freezer jam (you could use any kind of jam).  The amount of jam is totally up to you. I may have added an addition tbsp or 2 as I mixed-I can't be sure.  
Now follow the recipe as it is written only spread the cream cheese mixture on the bread before rolling.  This were easy to make but they take a few minutes to cook so plan ahead.  Also I had a hard time keeping them rolled up before I put them in the egg/milk mixture so I used a toothpick to hold them closed and set something heavy on top of them (I used my rolling pin).  Now for the make ahead part.  I followed the recipe as stated and was able to make 12 rolls.  Place these on a cookie sheet lined with parchment and place in your freezer until firm.  Transfer to a freezer bag and now you have quick and easy breakfast rolls ready to go.  Just pop them in the microwave until soft (but be careful because the center will heat up fast and could burn).  If you take a bit of time one afternoon you could make a bunch of these and have easy breakfasts ready for a while (well unless your family can't resist them and scarfs them quickly).  These are sweet but also have a bit of tang from the cream cheese.  Drizzle them in some warm syrup and you will be in heaven.
Pin It!
Print Friendly and PDF

May 16, 2013

T-shirt Ruffle Skirt-The Rainbow Version

Back in February I showed you my tutorial to make a ruffle skirt from recycled t-shirts.  At that time I said that I would be sharing a rainbow version in the future.  Well after what feels like a million other things going on in my life, I finally to it done and am super excited to share the idea with all of you.

Presenting Miss Sunshine with her rainbow ruffle skirt.
 I made this following the same basic tutorial that I used for the black one only this time I made it bigger and longer.  It was a bit trickier sewing the ruffles to a larger skirt because it was already gathered from sewing on the waste band first.  The thing though that I love about these is that they are full of flaws but you can't tell.  
I am not sharing a full tutorial here for this because it is made pretty much like the black ruffle skirt.  I will just share a few details:
 Each rainbow ruffle is made from a t-shirt.  I used 3 inch wide strips and cut through both layers of the t-shirt like this: (I start by cut at one end and then fold it over and use it as a guide for the rest of the cut)
 I cut 2 layers from each shirt this way and then cut one seam in each making them into long strips.  I sewed the 2 long strips together to form one REALLY long strip and then gathered one edge of that.  I pinned the ruffle to the skirt and sewed along my basting stitches.
Every layer after that was sewn the same way and pinned and sewn underneath the above layer.
I made 2 of these and the first one I sewed the waste band on first and the second I sewed the waste band on second.  I am not sure which method I liked more as they each presented a few of their own challenges (sewing if first made the skirt gathered and a bit tricky to pin onto and sewing it last made it hard for me to line up the waste band perfectly with the top ruffle.  This skirt I am showing is the one I sewed the waste band onto last) but in the end the skirt turned out so cute and bright and cheerful and my girls LOVE them. 
Pin It!
Print Friendly and PDF

May 15, 2013

Works For Us Wednesday: The 52 Week Money Challenge

I have previously shared with you the envelope budget that I have been using and LOVE and the $5.00 savings plan with I also LOVE-both of which are so simple and so easy to use and they both are saving me money.  Today I want to share another simple money saving idea that we are starting in our house: the 52 week money challenge.  I just read about this and knew that this was something that we could totally do in our house.  Here is the breakdown:


So for 1 year you put away money once a week in increasing increments or decreasing (I read of some people that are starting with the large amount and working down-which is what I am doing) and at the end of the year you will have nearly $1,400.00 saved up.  The thing I love about it is that the most you will have to come up with is $52.00 in one lump sum.  My husband and I discussed it and both decided to start it now (yep in May) because school is just about out and if we start it now by the same time next year (when school is just about out and we are planning for the summer) we will have a nice little vacation budget saved up that we can use or save for one more year and double.  I love savings ideas like this; anyone can do this.  So I decided to share it now because many of you are also nearing the end of a school year and getting ready for summer and who doesn't need a little vacation fund, or renovation fund or adult only getaway fund.  I printed out the breakdown and taped it right next to our computer where we do our budgeting.  We are doing it online by transferring money from our checking account to our savings account each time rather than putting cash in a jar because we don't always have cash on hand. This couldn't get any easier.  I mean you aren't going to be able to retire on it-though if you did it year after year you could have a nice savings fund tucked away.  Man I love when I find stuff like this-just had to share.
Pin It!
Print Friendly and PDF

May 14, 2013

Your Photo Studio - Giving You the Chance to Take Professional Looking Pictures

I love taking pictures of my kids.  With more than 13,000 digital files on my computer one might say I am a bit addicted.  But when you have cute kids what are you to do?  Well I have read many articles about making your pictures look more "professional" from camera settings, to lighting options, to making your own back drops.  There are so many things to try-sometimes it is a bit overwhelming. I have more than once thought, "Man if only I could go to ____________ and take my pictures there, I know I could take really cute pictures," or "If only I had the right lighting these would turn out so much better," or "Man I wish I had a cute backdrop to use-something that looks nicer than a sheet."  Well it just so happened that someone must have read my mind because not too long ago I got a message in my inbox about what I feel is the answer to all my photo shooting dilemmas it's called "Your Photo Studio".  What it is is a mini professional photo studio set up with backdrops, lighting and props all available for you to use.  The only thing you need to bring along is someone cute to take pictures of and your camera.  You can book in both 1/2 hour and 1 hour sessions.  You only pay to use the space.  Everything there is free for you to use.  You can use as many backdrops as you want and as many of their props.  You can bring your own props from home as well-pretty much anything (except food and pets).  The photo studio is located in Midvale, Ut at the Quilted Bear.  You can find out all about it on their website: Your Photo Studio.  The website shows you all of the options you will find in the studio, gives you photo ideas, gives a great tutorial on how to use the photo studio and lets you book a session online.  It is so super easy.  
I took my kiddos up this past weekend to test it out.  Now I have to say that even though this is a professional photo studio setting this does not mean that your kids will be magically transformed into perfect angels to have their pictures taken.  You will still want to plan the normal things one might plan for any photo shoot: make sure your kids are not tired, well fed, have plenty to drink and take plenty of bribes along.  I know this because I didn't do any of the above.  We don't live nearby so we traveled and spent the night with relatives and then traveled some more and by the time we got there everyone was hot, tired and hungry.  My little man has just learned to crawl so he did not want to cooperate, my little pumpkin had fallen the morning before and bruised her eye and had frazzled hair and my little Miss Small Fry thought her shirt was too itchy.  So the fact that I ended up with cute pictures at all was a miracle.  I loved all the backdrop options.  I wish I had the time to try every one of them.  And the props are really cool-great looking chairs, suitcases and tables.  Everything was really easy to use.  We had a 1 hour session and I managed to get pictures of all of my kids individually and a few group shots but like I said my little man was not having it.  I would love to add that I remained totally calm, cooled and collected through it all but that would be a big, fat, lie.  If I did it again (which I would love to) I think I would do individual 1/2 hour sessions for each kid and then use the end time for group shots (like book 3 sessions in a row).  I did feel a bit stressed with the time limit and that was a bit nerve racking.  After we left I was sure I didn't get a single good shot but when we got home and I got to look at all the pictures and do touch ups and things I was really, really happy with the way they turned out (even with frazzled hair).  Here are a few of my favorites:

This is 1 of 4 shots that I got of my little man before he wanted to take off.  I brought the wagon and props inside it from home.

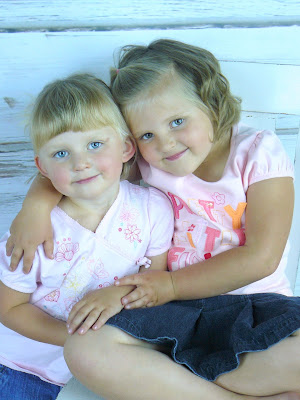
My beautiful girls.  This aged wood backdrop is one of my favorites.  

This is the one of the only group shots that worked because my baby was so wiggly and cranky.  It is actually very true to how life is at our house-crazy.

This is the "my cheeks are hurting from smiling so much" look

I brought the purse and shoes from home too.  They have this beautiful big white back drop.  I love how these turned out.

Look how blue her eyes are.  

This is one of the suitcases they have in studio.  Wouldn't it look cute with a baby laying inside on a big fluffy blanket (and they do have lots of fluffy blankets there).

This is another one of their fun back drops.  I love blue and it sure helps to bring out my kids beautiful eyes.  

Doesn't this make you wish that you had a photo studio just like this near by.  I just absolutely love this idea. It gives anyone the chance to have great looking pictures without the cost of hiring a professional photographer.  I mean, you still have to know what you are doing (which I don't really know much about) but if you have a good camera and some fun ideas you can really end up with some super cute pictures.  Oh and did I mention that you can have anyone take the pictures so even if you don't feel confident as the photographer and you know someone who is-then take them along.  So many possibilities.  If you live anywhere nearby you have got to check this out.  It is probably a good thing I don't live so nearby because I might be tempted to take A LOT of pictures there.
Check out Your Photo Studio and start planning your session.
Pin It!
Print Friendly and PDF

May 8, 2013

"You are Berry Sweet"- A Super Easy Teacher Appreciation Idea

 'Tis the season for teacher appreciation ideas and so I thought I would share my quick and easy idea.  This is one that would  be perfect for those, "Oh garbage....I forgot to get a gift for the teacher" moments or it is also perfect as a gift for someone that doesn't eat lots of sugar or may have other diet restrictions.  I made this for Small Fry's ballet teacher who is my good friend.  I know she is trying to be "healthy" and I am pretty much a diet sabatoger but I decided that instead of giving her something that would be hard for her to resist I would try and support her healthy eating habits and get strawberries.  Add a bit of gingham and some lace and this free printable tag and you are set-perfect for someone that you feel is "berry sweet".


And as a bonus idea (this is just the idea-someone out there could definitely make this much cuter) "Do you Donut?....We think you are the best _________."  I made this for Small Fry for after her dance recital.  It was a last minute thing but I wanted a surprise for her to come home to.  Like I said, you could totally make this so much cuter.  This could be used for so many things-notes for kids, for grandparent or for fathers day or for a teacher.

There you go-2 super quick and easy appreciation ideas-especially if you need something at the last minute.
Pin It!
Print Friendly and PDF

May 6, 2013

Make Monday: French Bread Chicken Bacon Ranch Pizza

I was feeling a little nostalgic the other day thinking back to my picky childhood days.  I was thinking about it because I now have a fairly picky child and I remember being a picky kid and hating it-mostly people always bugging me about what I did and didn't eat.  I hated having someone give me a lecture every time I went to their house or ate out and I hate having to now defend my child's choices.  She is picky in what she eats people...she is not a bad person.  END OF STORY!!!  I don't think I ever tried to make a big deal of it as a kid and when I went someplace and they served something I didn't like to eat, I just didn't eat it and I ate stuff I liked and went on with life.  And one of the things that I did not eat as a kid was pizza, in fact, I ate my first piece of pizza when I was 21, but my best friends growing up LOVED pizza.  Every time I went to their house for a birthday party they had pizza-pizza buns to be exact.  They took regular bread rolls, put pizza sauce on them and then pizza toppings and baked them in the oven.  I do remember they smelled good but I was never brave enough to try one-if only I had known what I was missing.  Well I am not scarred for not having ate pizza as a kid and I feel like I am pretty normal and now I go through spurts where I feel like I could eat pizza everyday.  Well this day was no exception-I was craving pizza-chicken, bacon, ranch pizza to be exact.  I wanted to be able to have everything I love about this pizza without the time of making a crust from scratch so I channeled my best friends mom and her house as a kid and remembered the pizza buns and created my own spin on that and came up with: french bread chicken, bacon, ranch pizza.

This is the perfect way to get everything you love about pizza but in half the time.  Here is what you will need:
French bread (I used half a loaf which was enough for 3 people though we all could have eaten more)
1/4 cup ranch dressing (may need less for half a loaf)
cooked chicken ( I grill mine and add a little seasoning) I use 2 chicken breasts
3/4 cup mozzarella 
3/4 cup cheddar cheese
2-3 slices bacon (chopped, friend and drained)
1 tomato (chopped)
2-3 green onion (chopped)
olive oil
Begin by slicing the bread in half and brushing each side with olive oil.
Place the bread on a cookie sheet and put it in the oven under the broiler until slightly toasted.  This step helps to keep the bread from getting super soggy with the addition of all the other ingredients.
Now spread each piece of bread with the ranch dressing.  Sprinkle with the mozzarella cheese.  Add the chicken, bacon, tomatoes, and onions.  Sprinkle the top with the cheddar cheese.  Place in an oven preheated to 450 degrees and bake for 10-15 minutes or until the cheese is melted and the top is toasted to your liking.  What you end up with is a crispy, light crust with all the pizza taste you could ask for.  The flavor was incredible and it was so quick and easy.  In fact I have been tempted to make this for dinner 4 or 7 days this week but resisted because it isn't that low calorie for sure.  Next time you are in the mood for pizza without all the pizza work give this a try: French Bread pizza.   I think you are going to love it.

Pin It!
Print Friendly and PDF

May 2, 2013

Easy and Adorable Personalized Dino Hoodies

If you have the cutest twin nephews in the world like I do then it isn't hard to want to make them really cute stuff.  These two are totally boys loving everything that has to do with farms, trucks, animals, sounds, jumping on things and wrestling.  Dinosaur hoodies were of course a perfect fit for them.  These are really easy to make with I guess the exception of sewing on the letters.  That part is a bit more tedious but not difficult.  Of course if you don't want to tackle a project like this I would be happy to make one for you.  I'll leave the details at the end of the post.
For this you will need:
1 zip up hoodie
1 old t-shirt (for the letters)
felt (for the dino spikes)-I used the rectangular crafting felt pieces
Thread that coordinates with the dino spikes (which I also used on the letters for extra effect)
Begin by making the spikes.  There are a few tutorials out there on how to make these.  This method is the really easy method but I have seen and tried others that I like too.  Cut a strip of felt 3 1/2 to 4 inches wide and then entire length of the piece of felt (I am using one of those rectangular pieces of craft felt).  What ever you want the finished size of the spike to be is how wide you will want the felt piece cut.  If you are making a coat for a littler boy you will want smaller squares and bigger squares for a bigger boy.  To save even more time cut a second strip of felt the same size and place one on top of the other.
To make squares fold the end of the strip up to meet the side to form a triangle (like so) and cut across the top.   
When you unfold the felt you will have neat little squares.  Now to get the triangle spikes cut these in half-corner to corner making 2 triangles. 
 Now before sewing anything I line all of my spilkes up approximately where I want them on the hoodie to see how much I will need to space them and if I have enough to cover the whole hoodie (keep them in layers of 2-you need two triangles stacked on top of each other for each spike).  Depending on the size you choose for spikes you may need more or less to cover the entire back and hood.  You also may need to cut them down in size slightly if you just can't make them fit.  My hoodies were size 4T and I needed 6 spikes.  
 Once you have figured out how many you will need sew the triangles together leaving the long side open.
 Now pin all the spikes back onto the hoodie.  It is pretty tricky getting the spikes on the hood to lay how you want them-so give them an extra pin or two.
 Now sew up the back of the jacket along the bottom of each spike-I just sew in a continuous line from the bottom to the top.  The spikes will lay down (but they will anyway when a kid wears the jacket and sits any place in it).  You can iron them to make them stand up for show but keep in mind that you will never be able to get them to stand up all the time (and man would that be uncomfortable anyway).
 Now for the name.  I took a few of the letters in their first name and added them to "saurous".  I just used my Word program and picked a font that would be big and chunky, and typed the name.  The full name is going to be pretty long so don't make the letters too huge but you also want them big enough so they will be easy to sew.  Print the name out and trace is backwards (I use my window to help me with this) onto Wonder Under (by Pellon).
 Now iron the letters onto a piece of material cut from an old t-shirt.  T-shirt material is my favorite to use for applique projects.  First it is super cheap when you can use your old shirts or buy them at a thrift store and second they don't fray at all.  After you have ironed then cut out each letter.
Before you iron anything onto the jacket play around with the spacing because with a long name you may have to offset the letters to make them fit.  You will have to sew over the pockets to make it work also. When you like the layout iron the letters in place.
 Now stitch over them with the same color that you used on the spikes.  I like the contrast it gives.  
 Here is a tip for appliqueing little pieces like letters-do not trim your threads in between each letter.  I sew one, then when my needle is up, I raise the presser foot, reposition my fabric and then put the presser foot back down and start sewing again.  I trim all the threads at the end.  This saves you time and it saves thread.
See it really was pretty darn easy don't you think.  I love how the yellow looks on the blue.
 And the name turned out PERFECT!!!!!
And my models look pretty darn cool in their dinosaur coats.
 You can see that the spikes don't stay up perfect forever but they still look really cute so don't let that stress you out.  What little boy wouldn't love to be their own dinosaur   And actually a little girl would look darling in a pink and green dinosaur coat.  
Now if you LOVE the dino hoodies but don't want to make one yourself then let me do the sewing for you.  The cost is $15.00 for a personalized dino coat (size 6 and under) plus shipping.  You can give me some color specifications and I will do my best to meet those.  If you are interested send me a message at smallfryandco@gmail.com


Pin It!
Print Friendly and PDF
Related Posts Plugin for WordPress, Blogger...