
For a list of materials see Small Fry's Sew Along.
Today we will be sewing the snowman body and forming his head as well as putting on his face. This is a picture heavy post because I wanted to try and document each step carefully.
MAKE SURE AND CLICK "READ MORE" to find the tutorial. It is long so I didn't want anyone not interested to have to scroll through all of it.
MAKE SURE AND CLICK "READ MORE" to find the tutorial. It is long so I didn't want anyone not interested to have to scroll through all of it.
1. Cut large material piece for body. Turn right sides together and sew a ¼ inch seam to form one long tube.

2.Thread a large sturdy needle with 1 long piece of embroidery floss (a reader suggested using dental floss instead-have to try it some time). Tie a knot in one end.


6. Fill the bottom of the tube with something to weigh your snow man down and help him stand upright. I used pinto beans because I had an excess of them in my house (hey I still consider this “using my food storage”). I placed mine in a bag first. This will allow you to do the next step. I secured the top with a rubber band. I used about 6 cups of beans. You can have more than this-but I wouldn’t recommend less. I actually recommend more (if I could go back I would have filled him up a bit more).


Wrap the bag of beans (or whatever you are using) in a piece of quilt batting. I found I had to tape it to the bag to start and then to itself before putting in the tube. Don't secure the rubber band around the bag too tight because you want to have room to manipulate your weights inside as you slide this in.


8. Finish stuffing the rest of your snowman. You want him firm. When you get near the top don’t stuff him as much as you will need to be able to manipulate the top to form his head.

(this is the top stuffed loosely).


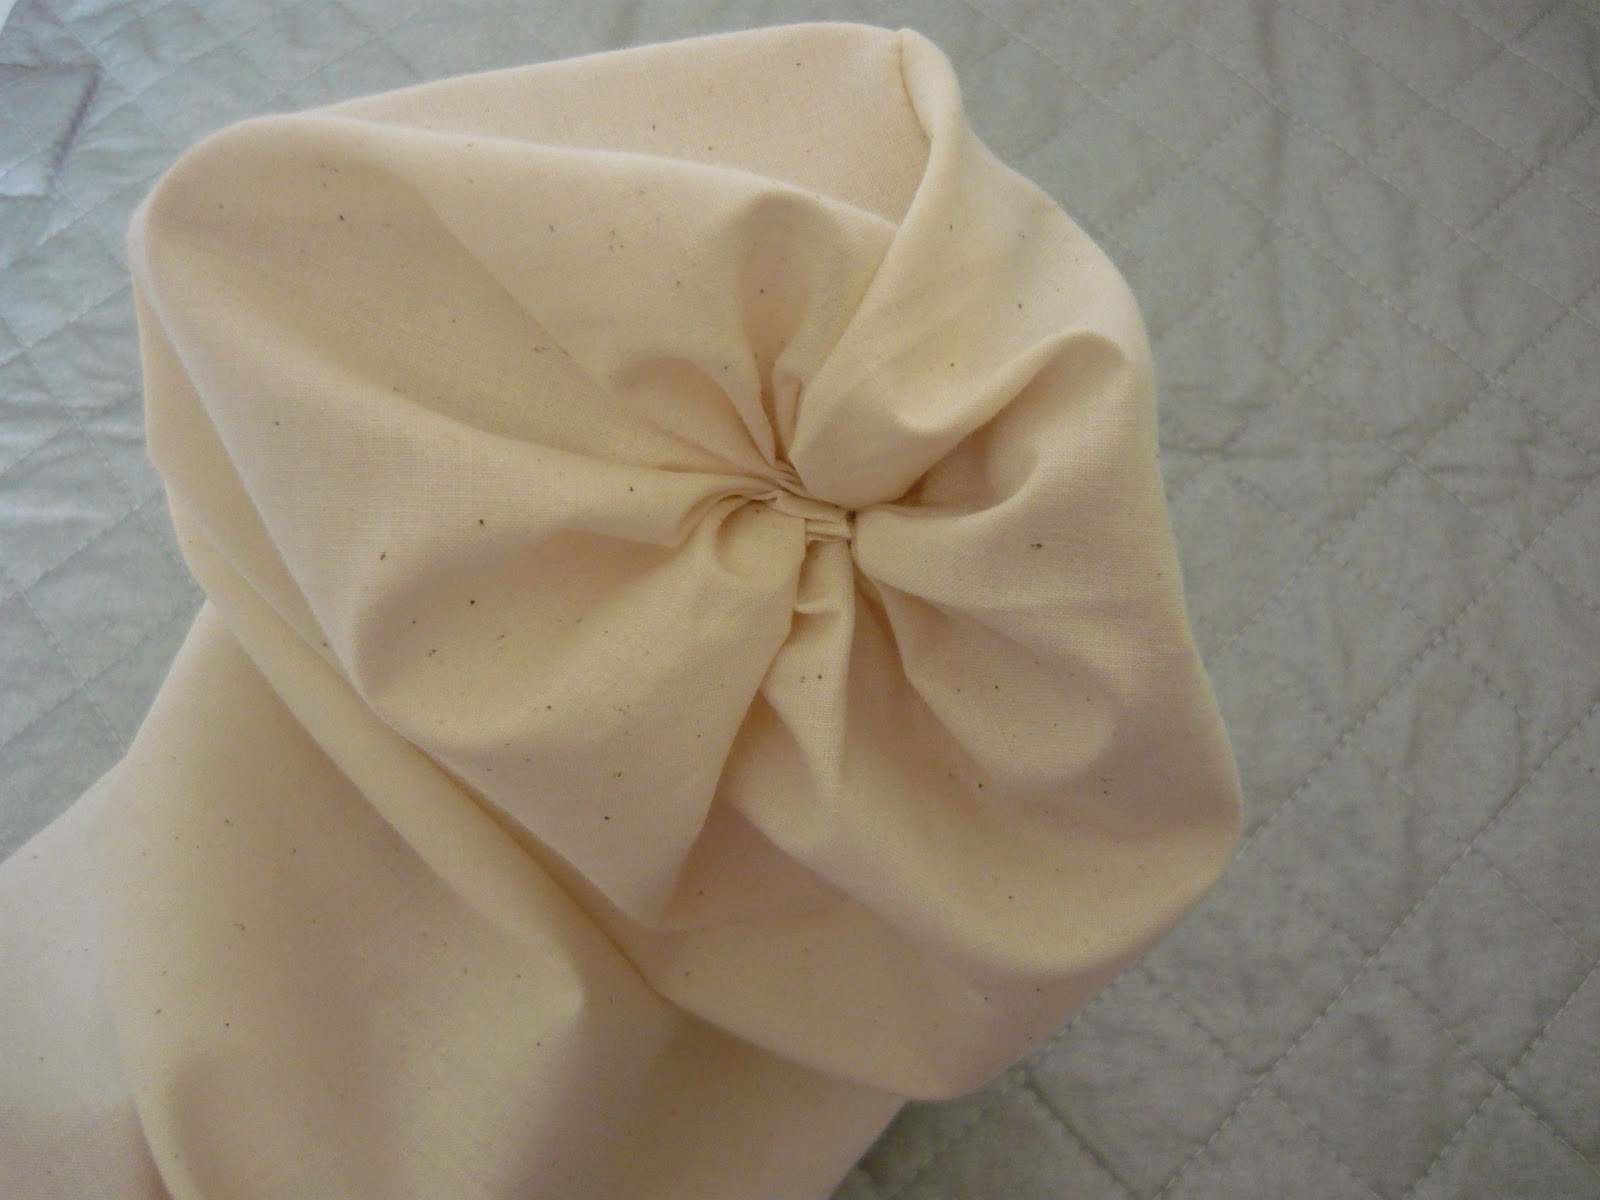
10. Now you will want to define his head. I did this by placing a rubber band around the tube where I would want his neck to be. This will be covered with a scarf. Mine is about 6 ½’ down from the top.

11. Now because I am weird-I have to put his face on next. I can catch the whole vision better when my creation has a face. This could have been done before he was sewn up at the top I suppose. Since his head is going to be covered this works too. Thread a needle (a large honking one) with black embroidery floss. I used 4 strands but 3 will work too or all 6 just not less than 3. Tie a knot in one end. Starting at the top near the gather insert your needle then pinch his head with your fingers...


You made it. You completed day 1. Now get your rest so you will be ready for day 2. Don't forget to grab a button if you would like to spread the word.
To go right to the instructions for days 2 and 3 click here:


I was going to link today, but I don't see the post with pictures and directions!
ReplyDelete